Bought yourself a shiny new Samsung Galaxy phone? You might need some help familiarizing yourself with the interface or a few tips that will help you make the best out of your new purchase. That’s exactly what you’re going to find in this article! Whether you’re new to Samsung’s phones or just upgrading from an older model, we’ll tell you the first 10 things you should do with a new Galaxy phone to ensure you have the best experience. So, grab your phone, sit back, and follow these simple steps to customize the device to its full potential!
Navigate this article:
- Disable Ads/Promotions during Setup Process
- Transfer Data from your old phone
- Customize your Homescreen
- Setup Secure Folder for Sensitive Data
- Remap the Bixby Button
- Set up Always on Display
- Use Dual Apps for Messengers
- Improve Multitasking with Edge Panels
- Extend Battery Life with Power Saving Modes
- Customize every single aspect with Good Lock!
Best mid-range Samsung phone
The Galaxy A52 5G is a capable mid-range smartphone from Samsung that covers all basics. If you're looking for a reliable phone without breaking the bank, this is the one you should consider.
Best foldable for most people
The Galaxy Z Flip 3 is the most affordable foldable phone that doesn't make a lot of compromises. It has the latest chip, a unique design, and even includes an IP rating this year. It's a head-turner for sure!
The ultimate flagship phone
This is the best smartphone that you can get from Samsung that covers all bases. It's got solid performance, the most versatile set of cameras, and a gorgeous display. This one's the do-it-all.
1. Disable Ads/Promotions during Setup Process
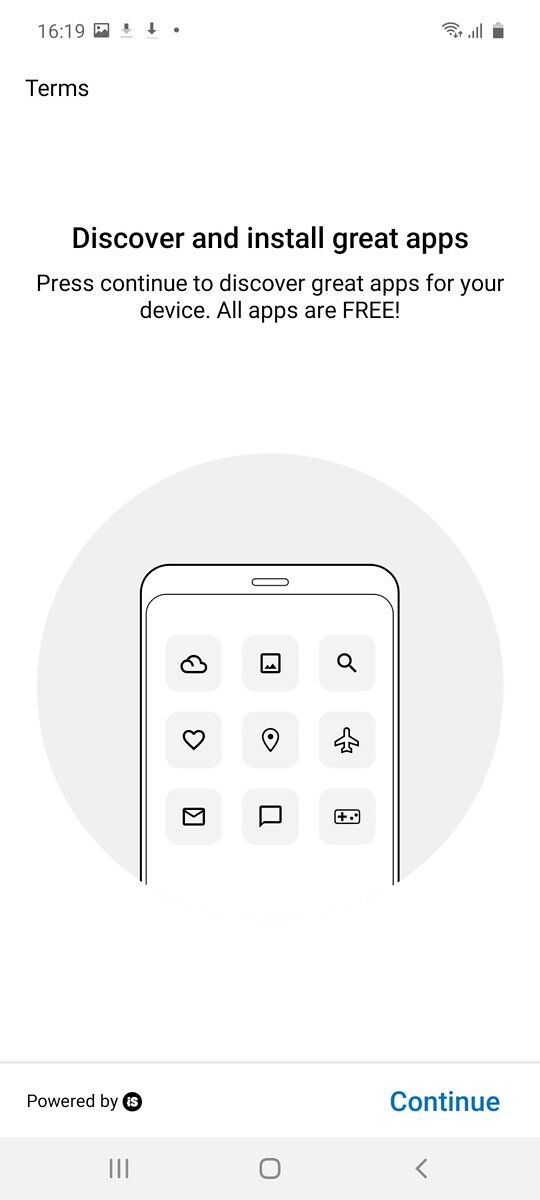
The first thing you do when you get a new phone, apart from inserting your SIM card into it, of course, is going through the initial setup process. This is quite straightforward as the instructions are displayed on the screen as you navigate through the entire process. However, there are a few options during setup, that if selected, may not result in an ideal experience while using the phone.
For example, Samsung is known to display ads and send promotional notifications on some of its phones. This can be avoided by deselecting any such options that ask for your permission to display promotional content. It’s easy to overlook such checkboxes while setting up the phone, but the rule of thumb is don’t blindly agree to and select every option shown to you on the screen. Make sure you read the options on the screen thoroughly and select only the ones that are absolutely essential to use the phone.
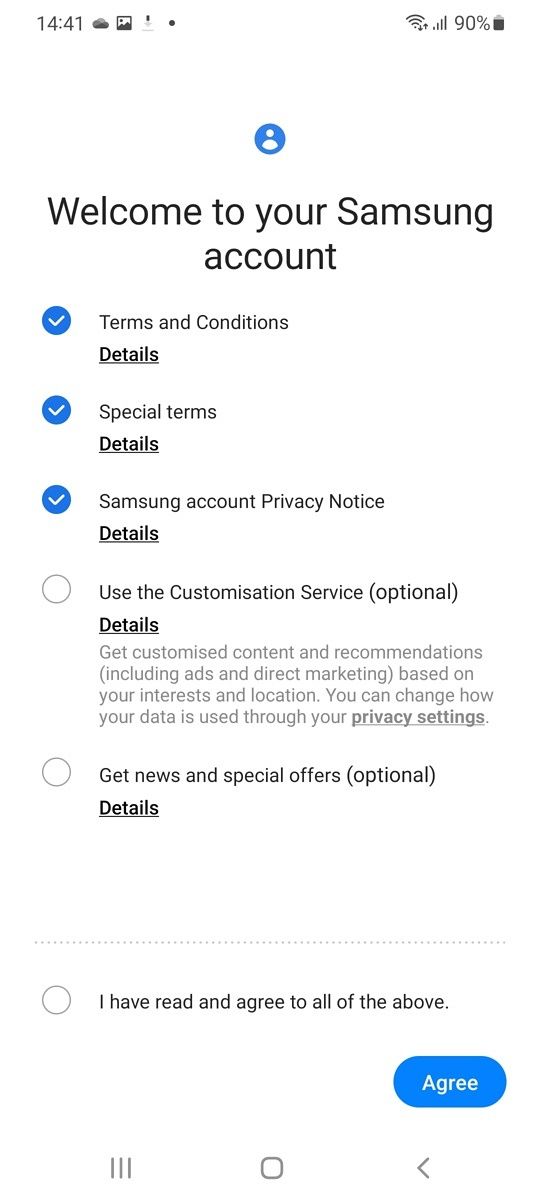
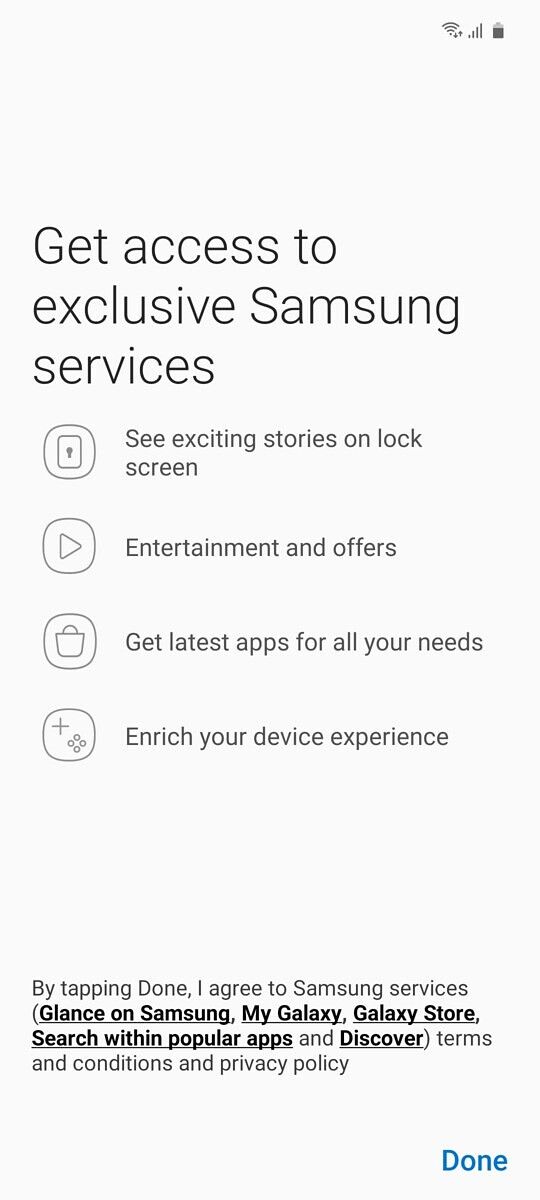
Setup Process on OneUI 4.0
While setting up your Samsung account, you will be asked to agree to various terms and conditions, some of which are mandatory, while the others are optional. The Terms and Conditions, Special terms, and Samsung account Privacy Notice have to be ticked compulsorily for you to proceed further. Select these options only. Do not select the ‘I have read and agree to all of the above’ option.


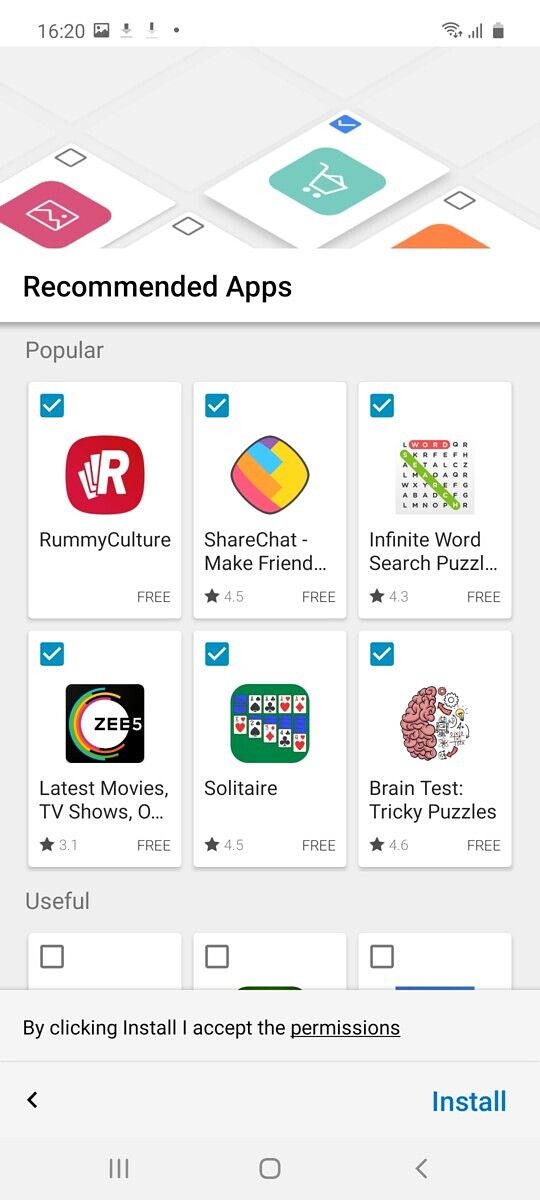
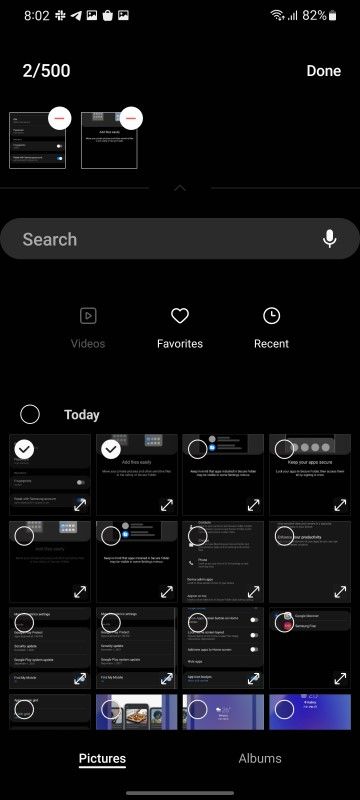
Once you enter your details, you will see a screen that says Review additional apps. Uncheck the All of the following apps checkbox and select only the apps that are important to you. If you don’t use any of the apps listed, you can skip through this step entirely. Samsung will also ask you to Get recommended apps which are essentially Samsung’s first-party apps, and we could see no way to skip this.
Setup Process on One UI 3.0 and earlier
Agreeing to the End User License Agreement and Privacy Policy are absolutely essential without which you won’t be able to use the device. However, Sending of Diagnostic Data, Information Linking, and Receipt of Marketing Info are optional and we urge you to uncheck these checkboxes, especially the last one. Generally, users tend to select the Agree to all the above option amidst the excitement to use the phone. You shouldn’t be doing that. Some budget and mid-range Samsung phones also come with a Lock Screen Stories option that displays unwanted content on the lockscreen. Disable it if you see the option during setup. If you see any other option that has Allow Recommendations… in it, it’s wise to uncheck it.


Another thing to note while setting up the phone is to not install any unnecessary app from the Recommended apps list. Samsung will try and push you to install apps they’ve partnered with, but it’s best to deselect the ones you don’t need or use. You can install specific apps that you need later on via the Play Store, or restore a backup/transfer data from an older phone which would restore all the apps you use.
2. Transfer Data from your old phone, including an iPhone!
Samsung gives you a nice option to migrate your data from an older phone to your new Galaxy phone. It’s called Samsung Smart Switch and the option to use it is presented to you while setting up your new Samsung device. What’s cool is that by using this process, you can transfer all your existing data from your old smartphone to your new device. This includes apps, messages, photos, videos, etc. The best part is that Smart Switch even lets you transfer your data from an iPhone to your new Galaxy phone.


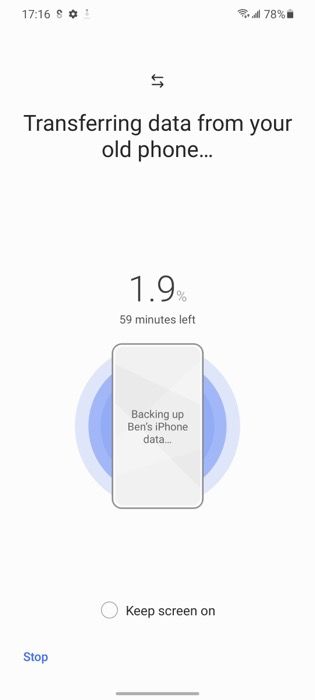
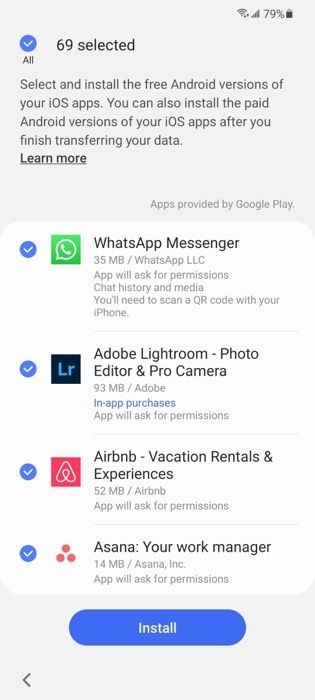
If you’ve switched over from iOS to Android since it’s clearly the better smartphone OS (sorry, Mahmoud), you will be able to install the same set of apps on your new phone that you previously used on your iPhone. In fact, you can now transfer WhatsApp chats from iOS to Android if you have a Samsung Galaxy phone, and we recommend you do this early on as the process works only if your phone is in a brand new state. If you don’t have your older phone with you because you traded it in for a new one, you can even restore a backup from your old phone alternatively.
3. Customize your Homescreen
Alright, you’ve set up the phone and you’re into the UI. Now what? Well, the beauty of Android is that you can customize various aspects of your phone to no limits. While some customizations require additional apps like launchers or mods for power users, you get a ton of options in-built especially on Samsung devices. The homescreen of your device is what you interact with when you first unlock your device, so it’s a good idea to customize it as per your liking.


You can change the wallpaper, add widgets, try a different icon pack, or even change the grid size on the homescreen. To do this, tap and hold an empty area on your homescreen to bring up the homescreen menu. Now, tap on Home screen settings. Here, you can choose the homescreen grid size, enable/disable notification badges on apps, and even hide your apps from the app drawer.
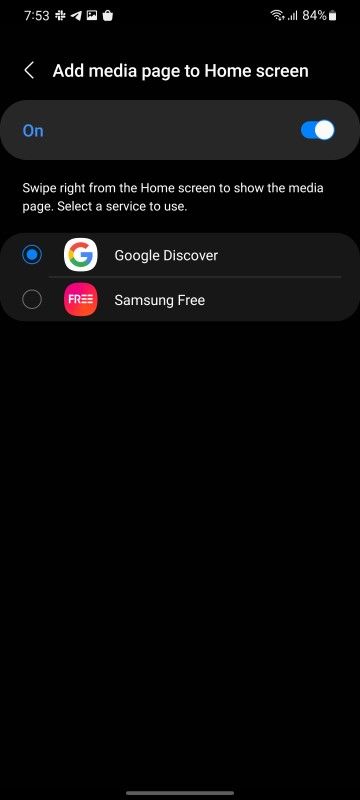
By default, Samsung also displays a Bixby pane to the right of the homescreen on some devices. You can disable this by holding an empty area on your homescreen to bring up the homescreen customization menu. Now, you’ll see all your homescreens as scrollable windows. Scroll to the left-most window which is Bixby home. You’ll find a toggle about it which you need to disable.
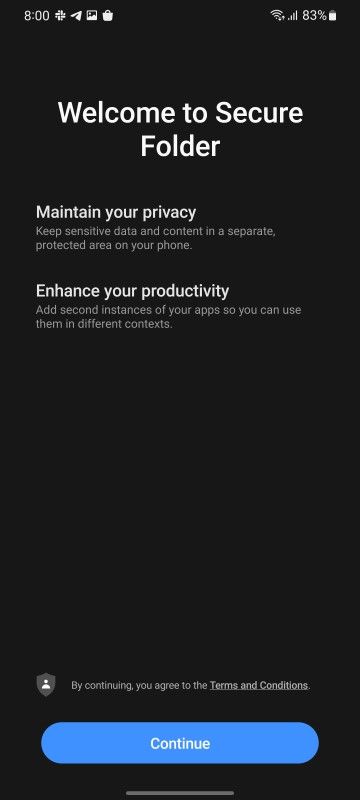
4. Setup Secure Folder for Sensitive Data
This is a feature that’s quite underrated on Samsung Galaxy phones. Samsung devices have Knox security and a part of that is something known as Secure Folder. Enabling the option basically creates a folder on your phone that is encrypted with a PIN or pattern that’s different from the one used to unlock your phone. Once you create a Secure Folder, you can store sensitive information and data like photos, account numbers, documents, in it.
Several people store their credit card numbers, PINs, etc. on their smartphones. While that’s not a good practice, Secure Folder just adds an additional layer of security for such information. Even if someone else manages to get into your phone, they will also have to get through the additional security of the Secure Folder to access your personal information. Note that Secure Folder is present only on some Galaxy phones, mainly mid-range and flagship phones. If you have a budget-oriented Samsung device, chances are that you may not have this feature.
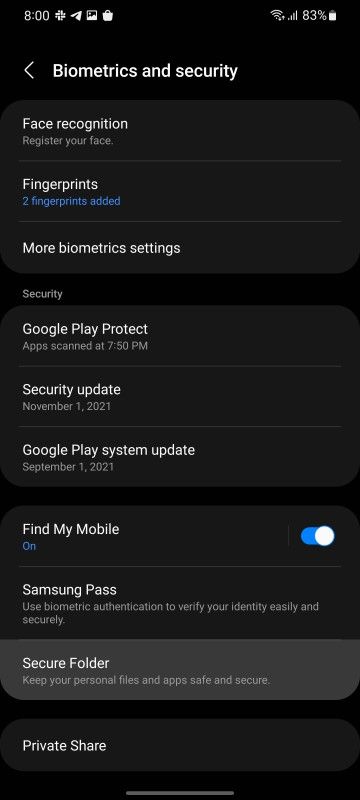


If you wish to set up the Secure Folder feature on your phone, head over to Settings > Biometrics and Security > Secure Folder. You will be prompted to sign in with your Samsung account now if you hadn’t done it already. Once done, you can enter the password to access Secure Folder followed by setting up a biometric way to access it like your fingerprint. Once this is set up, you can add files or whatever you want into the Secure Folder. If you wish to move existing files or photos to the Secure Folder, go to the Gallery app, long-press on the item you wish to move, and select the Move to Secure Folder option.
To access Secure Folder, you can either tap on the icon in your app drawer or the quick toggle in the notification center.
5. Remap the Bixby Button
By default, the key on the side of your Galaxy phone is used to turn the screen on/off with a single press. While that functionality cannot be changed, you can customize the long-press and double-press functionality of the key. To do this, head over to Settings > Advanced Features > Side Key. Here, you can select what function you want to assign to the power button when you double-press it or press and hold it.


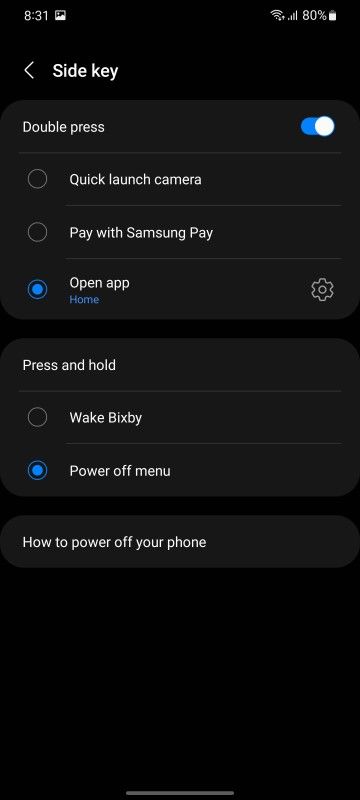
I like keeping my double-press setting to launch the camera app. It’s a nifty little shortcut for when you want to open the camera app quickly and don’t have the time to unlock the device, get to the homescreen, and then launch the app. The press and hold option is set to Wake Bixby by default which can get rather inconvenient if you don’t use Samsung’s assistant. You can change the Press and hold option to trigger the Power off menu like how it used to be conventionally on all phones a few years back. This way, pressing and holding the power button will enable the power off and reboot options instead of triggering Bixby.
6. Set up Always on Display
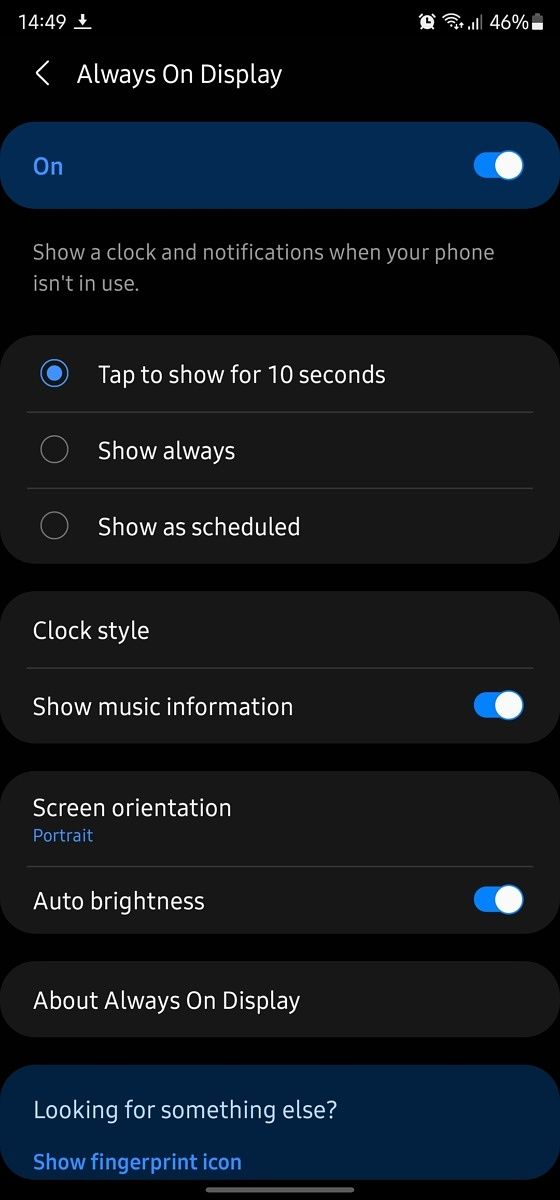
If your Samsung phone comes with an AMOLED display, there’s a good chance it has Always on display functionality. If you’re not familiar with the feature, Always on display is literally what the name says — it keeps your display always on to show you important information like the time, date, calendar events, pending notifications, etc. It’s pretty useful if you don’t want to constantly turn on the screen of your smartphone to check the time or notifications and end up using the phone for a lot of time.


To enable Always on display on your Galaxy phone, head over to Settings > Lock Screen > Always on Display. Here, you can choose whether you want it to show up for 10 seconds or let it remain on all the time. I prefer the latter. You can also choose the clock type and what information you want to be displayed. Once you start using this feature, you just cannot live without it.
7. Use Dual Apps for Messengers
Samsung has added a nifty feature in One UI that lets you create a cloned version of an app and use two versions of the same app on your phone. If you have two SIM cards and you want to use two WhatsApp accounts or two versions of Facebook Messenger for two different accounts, you will be able to do it natively by following a few simple steps.


Head over to Settings > Advanced Features > Dual Messenger. Here, you’ll see the list of apps installed on your device that can be duplicated into a secondary app. Select the apps that you want a secondary version for and tap Install. Wait till the process is done, and you now have two versions of the same app. A secondary version of the same app is denoted by a small orange banner on the bottom right corner of the app icon on the homescreen as well as the app drawer. You can use that to differentiate between the two apps.
To disable the second version of an app, head over to the same menu and turn the toggle off next to the app.
8. Improve Multitasking with Edge Panels
The Edge panel was first introduced to add extra functionality to the curved edges on Samsung flagships. Since then, it has made its way to several Samsung phones and is a great tool if you multitask a lot on your phone. It’s a small translucent bar that rests on the edge of your display. Tapping on the bar reveals several options like quick shortcuts, various screenshot methods, favorite contacts, media controls, clipboard, etc. You can even set up app pairs in the Edge Panel for your favorite set of apps that you use together. Tappin on an app pair will open the two apps simultaneously in split-screen view making it easier for you to multitask.

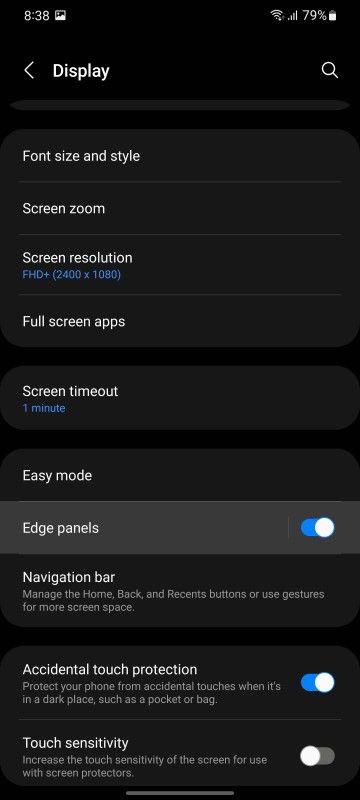
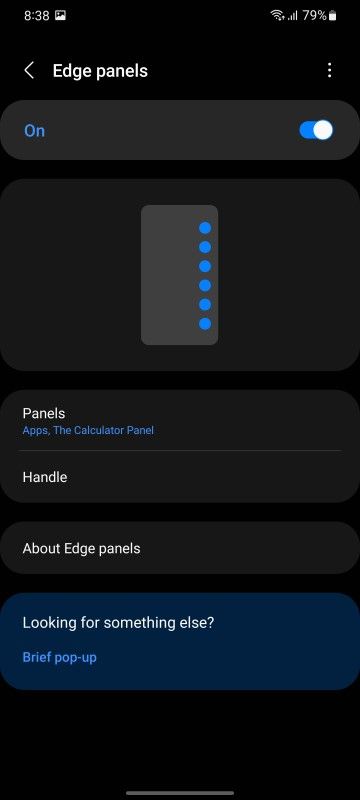


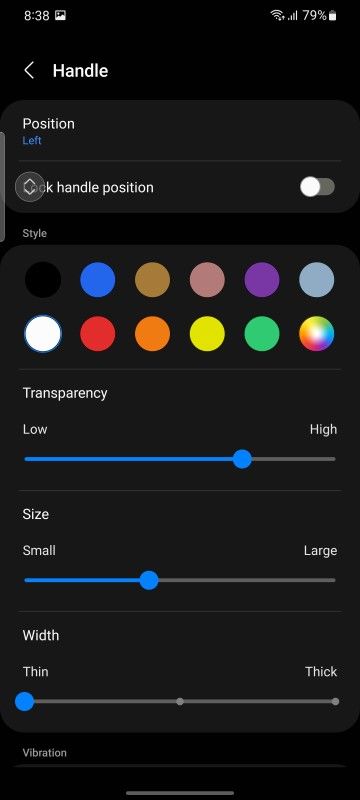
To activate and use Edge Panel, head over to Settings > Display > Edge Screen and enable the toggle next to Edge Panels. You can now tap on the small portion of the screen on the edge to activate Edge Panel on top of any app that you’re in. From here, you can also customize the Edge Panel to include all the features and options that are important to you. Note that Edge Panel is only available on certain Samsung phones and not on all devices.
9. Extend Battery Life with Power Saving Modes
Most smartphones these days come with good battery life and last throughout the day if not longer. However, you may face certain situations where you would want to extend the battery life of your Samsung Galaxy phone further. If you know you’re going to be away from the charger for a long time, you might want to save up some juice for emergency situations. That’s where the various power-saving modes on One UI come into the picture.
Samsung phones come with three different battery modes — Normal, Mid power-saving, and Max power-saving. Depending on the situation, you can switch between these modes.
The Normal mode is for when you want your phone to perform the best with all the available features. It makes the best use of all the resources and enables the fastest performance. Essentially, this is the mode with Power Saving Off or disabled. For regular use, this is the mode your phone should be on at all times.
Battery Saver on One UI 4.0
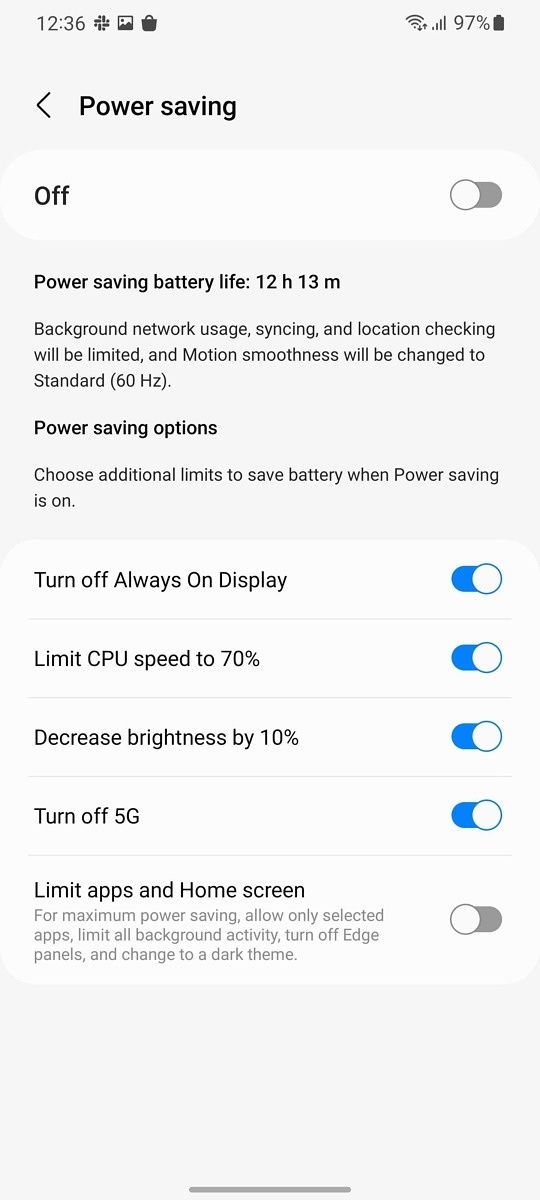
On One UI 4.0, Samsung has made a few changes to the battery saver. Instead of various modes, they have included a single option with a toggle to disable other functionalities that may not be vital during a battery emergency. To access the battery saver on a phone with One UI 4.0, head over to Settings > Device care > Battery > Power saving.
Here, you’ll find a master toggle to enable power saving mode. This will enable a moderate or mid-level power-saving where all your apps and services will be available to use. You will also be able to connect to the internet and connect to other wireless peripherals. Your CPU performance, however, will be throttled to save some extra power and all background activities will be paused. Other aspects like display brightness and refresh rate will also be reduced.


If you want the ultimate power saving mode to kick in, you will have to toggle the Limit apps and Home screen option in this menu. This is essentially the MAX power saver that was present in One UI 3.0 and below. You can read the description below to know what the Max power saver does but, in short, it limits your phone to the absolute basic functionality which is making/receiving calls, sending text messages, etc. It even replaces your homescreen with a black wallpaper. This is your last hope when your phone is on the verge of switching off.
Battery Saver on One UI 3.0 and below
Mid Power Saving mode is for when you want to extend your battery life by a bit without affecting the core functionality of your phone. This mode will still let you use all your apps and networks but will limit background usage, tone down your screen refresh rate and resolution, limit display brightness, and disable Always-On display to extend battery life. Use this mode for when you know you’re only a few hours away from a charger so you want your phone to last just an extra bit longer.
Max Power Saving mode is the ultimate rescue tool for when you’re in dire need of battery life and your phone is on its last legs. This mode essentially disables all the functions of your phone that aren’t absolutely necessary and limits it to a set of 8 apps that you can choose from. You can configure apps like dialer, messages, browser, etc. and those will be the only apps you will be able to use when you’re in Max power Saving mode. Things like internet connectivity and Bluetooth will also be limited and your wallpaper will be changed to a black background. If you want to extend your battery life by a big margin and want your phone to stay alive for basic functionality like making and receiving calls, use this mode.
To access the various power-saving modes, head over to Settings > Device Management > Battery and select the desired mode.
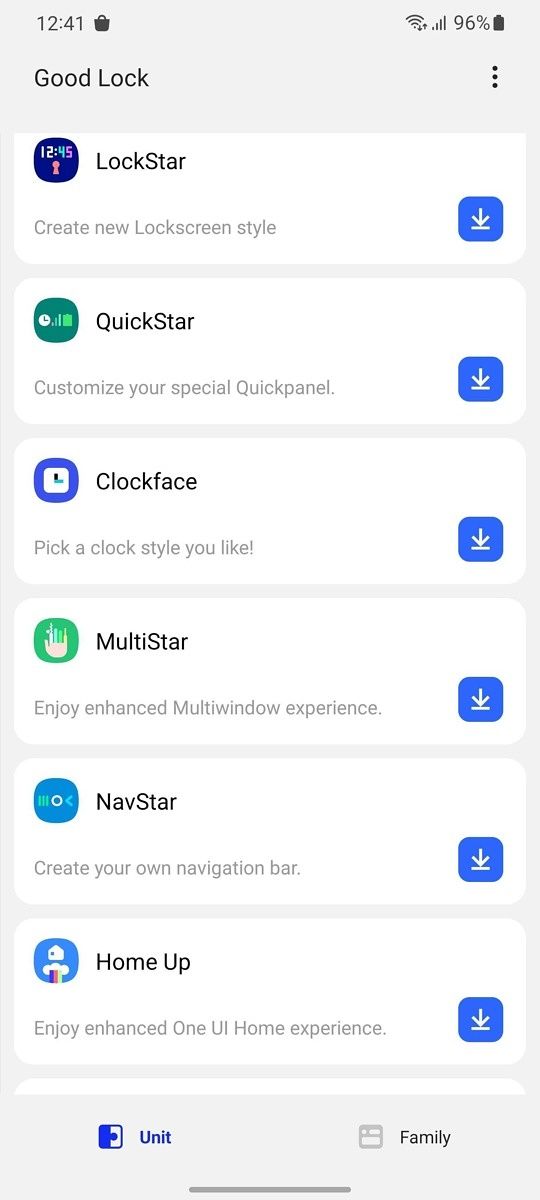
10. Customize every single aspect with Good Lock!
I saved the best for the last! Good Lock is an app that can be downloaded via the Galaxy App Store. You can customize every single aspect of your Samsung Galaxy phone with Good Lock. From the notification center to recent apps, the lockscreen to the navigation bar, the app has got it all. First, head over to the Galaxy App Store and download Good Lock on your Samsung phone. Then, open the app to find all the various customization modules that serve different purposes.


There’s NotiStar for notifications, LockStar for the lockscreen, Multistar for multi-window and multitasking, NavStar for the navigation keys, and a bunch of other customization options that you can use to completely change the way your phone looks! If you have a foldable from Samsung and struggle with the weird aspect ratio in some apps, Good Lock even has a module to change per-app aspect ratios to fit the screen.
The possibilities are endless with Good Lock. I urge you to install the app and spend a good amount of time going through all the various modifications you can make. You surely won’t be disappointed!
So, what are you waiting for? Grab your brand new Samsung Galaxy phone and get to work! Customize the device to make it your own and follow all the simple tricks to get the best out of your device. Which of these tips did you like the best? Let us know in the comments below!
The post First 10 things to do with a new Samsung Galaxy Phone appeared first on xda-developers.
from xda-developers https://ift.tt/3yXZhFu
via
IFTTT