LightBlog

dimanche 7 mars 2021

OnePlus 9 series with new Hasselblad camera system to launch on March 23rd

Over the past several weeks, we’ve seen plenty of leaks and rumors about the upcoming OnePlus 9 series. While the leaks have revealed quite a lot about OnePlus’ next-gen flagships, there are still quite a few things that we don’t know about the OnePlus 9, OnePlus 9 Pro, and OnePlus 9R/Lite. However, we won’t have to wait too long to learn these details, as OnePlus has now officially announced that it will be unveiling the devices in just a few weeks.

OnePlus has confirmed that it will lift the covers off the OnePlus 9 series on March 23rd. The new devices will be launched at 10:00 AM EDT, 14:00 PM GMT, and 19:30 PM IST. Along with the launch announcement, OnePlus has finally confirmed that it has partnered with Hasselblad to develop the camera system on the devices. The company has revealed that it plans to invest over USD 150 million over the next three years to further enhance its mobile imaging capabilities in partnership with Hasselblad. This means that we can expect to see a Hasselblad-branded camera system on future OnePlus devices as well.

OnePlus Hasselblad

Talking about the partnership, the company’s Founder and CEO, Pete Lau, said, “OnePlus has always prioritized a premium user experience over everything else. Beginning in 2021, we are making a concerted effort to significantly improve the smartphone camera experience for our users, with the expertise of a truly legendary partner in Hasselblad. With OnePlus’ top-of-the-line hardware and computational photography and Hasselblad’s rich aesthetic knowledge in traditional photography, I am confident that the OnePlus 9 Series will be a major leap forward in our ability to deliver a premium, flagship camera.”

As part of the partnership, OnePlus will work with Hasselblad on various camera improvements. The two companies are currently working on software optimizations, like color tuning and sensor calibration, and they plan to extend to more dimensions in the future. The results of the partnership will be evident on the upcoming OnePlus 9 series, which will feature a new color solution, called Natural Color Calibration with Hasselblad. OnePlus claims that this color solution will result in more perceptually accurate and natural-looking colors to photos taken with OnePlus flagship cameras. It will also serve as OnePlus’ new standard for color calibration for its future smartphone cameras.

Along with the new color calibration profile, the OnePlus 9 series will come with a new Hasselblad Pro Mode. The new mode will bring class-leading sensor calibration to a smartphone for the first time, and OnePlus claims that it will result in “incredibly accurate and natural color for a solid foundation for post-editing.” The new Hasselblad Pro Mode will also feature a bunch of UI changes based on Hasselblad’s image processing software that will give users an authentic Hasselblad look and feel. Furthermore, the mode will provide an unprecedented amount of control for professional photographers, allowing them to adjust ISO, focus, exposure times, white balance, and more. It will also feature a 12-bit RAW format for richer color and higher dynamic range.

OnePlus Camera Investment

Over the next three years, OnePlus plans to bring several more camera improvements to its devices in partnership with Hasselblad. To that end, the company will develop four major research and development labs around the world, including two innovative labs based in the US and Japan. It will also pioneer “new areas of smartphone imaging technology for future OnePlus camera systems, such as panoramic camera with a 14-degree field of view, T-lens technology for lightning-fast focus in the front-facing camera, and a freeform lens — to be the first introduced on the OnePlus 9 Series — that practically eliminates edge distortion in ultra-wide photos.”

Additionally, the company has revealed that the OnePlus 9 series will feature a custom Sony IMX789 sensor for the “largest and most advanced main camera sensor ever on a OnePlus device.” Thanks to 12-bit RAW support, the camera will be up to 64-times more colorful than previous generations, and it will deliver more dynamic and vibrant colors in pictures. It will also give professional photographers more leeway for editing in post. The Hasselblad camera on the device will also offer improved HDR recording, support for 4K 120fps video, and 8K 30fps video

Historically, OnePlus devices have lagged behind the competition on the camera front. So, we’re excited to see if OnePlus finally manages to offer flagship-grade camera performance on the OnePlus 9 series in partnership with Hasselblad. For more details, you can tune into the OnePlus 9 series launch stream, which will kick off on March 23rd on OnePlus’ website.

The post OnePlus 9 series with new Hasselblad camera system to launch on March 23rd appeared first on xda-developers.


from xda-developers https://ift.tt/3c6oPFA
via IFTTT

OnePlus phones will no longer have a Fnatic Mode

OnePlus first collaborated with the professional eSports organization Fnatic on the OnePlus 7 series back in 2019. The partnership resulted in a new gaming mode for OnePlus phones, called Fnatic Mode, along with an easter egg and a couple of Fnatic-themed wallpapers. Following the OnePlus 7 series launch, the new mode gradually rolled out to several older OnePlus phones, and it has since remained a crucial part of OxygenOS. But that’s about to change soon.

OnePlus recently started rolling out OxygenOS 11 Open Beta 3 based on Android 11 for the OnePlus 7 series. As per the changelog, the update only included a couple of optimizations and bug fixes. However, as Reddit user u/T1Az recently pointed out, it also brings a change for the Fnatic Mode. The gaming mode has been renamed to “Pro gaming Mode” in the latest Open Beta release.

OnePlus Pro Gaming Mode

Credits: u/T1Az

Since the company hadn’t made any official announcements regarding this change, we dug into the release to confirm the change. And we found several new “Pro gaming Mode” strings in the OnePlus Games app. We then reached out to OnePlus for a comment on the status of its partnership with Fnatic, and we received the following statement:

“OnePlus’ partnership with Fnatic has come to its natural and mutual conclusion. Users of OnePlus devices who have enjoyed our Fnatic mode will continue to receive the same features and capabilities, but under a new Pro Gaming Mode name. The naming update will transition across devices starting from the 6 series. Fnatic has been a supportive partner to OnePlus, and we look forward to the opportunity to collaborate again in the future.”

Since OnePlus’ partnership with Fnatic has always been a branding/marketing collaboration, you shouldn’t expect to see any functional changes in the new Pro Gaming Mode. All of its features will remain intact, but it probably won’t have the Fnatic easter egg or the Fnatic-themed wallpapers.


Thanks to XDA Senior Member Some_Random_Username for the tip about the name change!

The post OnePlus phones will no longer have a Fnatic Mode appeared first on xda-developers.


from xda-developers https://ift.tt/3kRVhzB
via IFTTT

How to code in Android Studio from any device with JetBrains Projector

JetBrains is the company behind some of the most popular IDEs, including IntelliJ IDEA, PyCharm, and PhpStorm. Even Android Studio, Google’s sort-of in-house IDE for Android development, is based on IntelliJ.

While IntelliJ’s IDEs are popular for a reason (they’re good), they can be a little heavy at times. IntelliJ and Android Studio can take up a lot of resources just by being open, for instance. And if you’re compiling something, they’re going to use even more. You also can’t (yet) really run JetBrains stuff on mobile devices, since JetBrains doesn’t have easily-accessible ARM builds.

So what happens if you don’t have a powerful computer, or you don’t even have a computer? Normally, this would be where you’d look around for other IDEs that do work on ARM. But JetBrains kind of has a solution, and it’s called JetBrains Projector.

What is a projector?

You’ve probably heard of remote desktop or VNC before. It lets you interact graphically with a computer over a local network or even the internet. JetBrains Projector works a little like a remote desktop, but without some of the disadvantages.

To use JetBrains Projector, you do need a computer somewhere on the Internet to host it. This could be an AWS instance or a home server. You can then connect to it from any supported browser, including mobile Chrome and Firefox.

But instead of displaying an entire desktop and sending a video feed of that back to a connected client, JetBrains Projector sends over the information needed for the client to display an IDE as if it were displaying locally. This means there isn’t any compression or resolution scaling, so the IDE looks almost native.

Also, JetBrains Projector isn’t limited to just the official JetBrains IDEs. As long as you have an IDE that’s closely based on one from JetBrains, you can use it with JetBrains Projector. That includes Android Studio.

Why a projector?

The biggest reason you might want to do remote development is what I talked about in the introduction: What if you don’t have a powerful x86-based computer? You could buy a semi-powerful one specifically for development work, or you could spin up a cloud server and use JetBrains Projector.

It can also be useful if you just want to offload the resource requirements. For instance, I have a pretty powerful gaming laptop with an i7-9750H and 32GB of RAM. That’s plenty for even the large projects I deal with. But if I want to do something else on top of development that’s resource-intensive as well, like watching YouTube, playing a game? Then things start to fall apart.

But I have a Ryzen 7 5800X server with 32GB of RAM in it. So I installed JetBrains Projector on that. Now I can just open a new Chrome window and connect to it from my laptop without worrying about juggling resources. The server also builds much faster than my laptop, so it’s a win-win situation.

How is using a projector?

JetBrains Projector is meant to be hosted on a Linux machine. That doesn’t mean you can’t run it on macOS or on Windows with WSL, but you might run into some weird issues because of that.

To get it set up, all you need to do is head over to the Projector Installer GitHub repo and follow the instructions there. They’ll walk you through getting the dependencies installed and getting an IDE set up. There are even some WSL troubleshooting steps if you need them.

Then you can just connect to your server address using the correct port and token (if you set one), and now you have an IDE running on your device without any of the bloat.

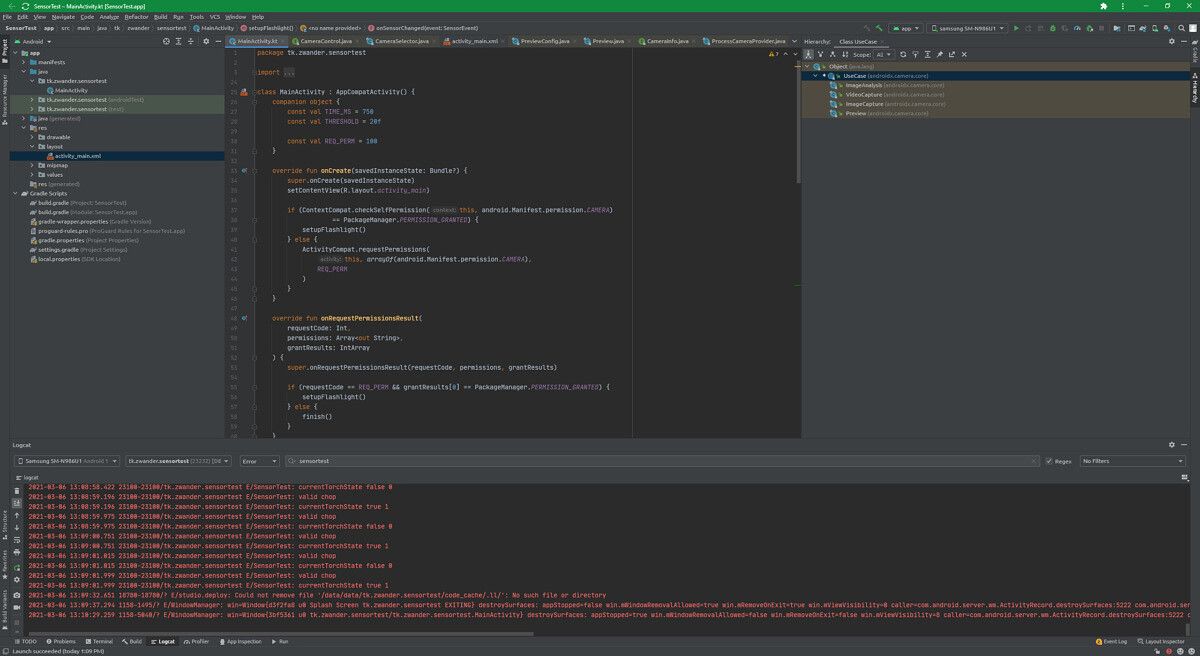
JetBrains Projector running Android Studio in Chrome

Android Development

I’m an Android developer, so while I could use IntelliJ IDEA for development, Android Studio tends to work better. While JetBrains Projector does support third-party IDEs, it’s now as simple as using the built-in command-line interface to download and install them. It’s still pretty simple, though.

To use Android Studio with JetBrains Projector, all you have to do is to download and extract Android Studio somewhere sensible. Then you can manually add it to Projector through the command line by specifying the path.

There’s also another problem with Android development and Projector: running apps. Without anything extra, you can code apps and view previews in Projector, but you can’t use an emulator or connect to a real device to actually run and debug apps. Or can you?

It’s almost like Google expected this sort of scenario to happen because ADB can connect to a remote server over the Internet. All that’s needed is an SSH tunnel from the client to the Projector server. I set Android Studio on the Projector to not try to manage ADB and to use port 5038. Then I just use some sort of SSH client (OpenSSH, plink, etc) to create a tunnel that forwards the ADB server running locally on port 5037 to the server on port 5038. Easy!

An SSH and X tunnel for JetBrains Projector

All you need is an SSH tunnel for proper Android development.

If you want more details on how to get Android Studio and SSH tunneling working, check out this GitHub document by Joaquim Verges.

One note about Android Studio and other third-party JetBrains-based IDEs: You can’t update them from the Projector screen. You’ll need to remote into the server directly and update them from there. Make sure the corresponding Projector instance is stopped before you do.

Android Android Development

Since JetBrains Projector runs in a browser, and you can connect from something like an Android phone, as a completely random example, I wanted to try something.

Android 11 introduced the ability to enable wireless ADB directly from the device. While some manufacturers exposed the setting before then, it’s not available for all Google-certified devices as long as they’re on Android 11 or later. While wireless debugging is meant to be used from a computer, it doesn’t have to be.

Apps like Shizuku demonstrate that it’s possible on Android 11 to connect with ADB to your device…from your device, without even thinking about using a computer. While Shizuku uses this to let apps run elevated operations, I think you can probably see where this is going.

So I made an app! I don’t know if I’ll ever make it public, but it’s pretty simple. I’ve got an SSH library in it along with an ARM64 ADB binary. I use the ADB binary to connect to the device I’m using, then I use the SSH library to create a forwarding tunnel from my device to the Projector server. And finally, I use it to store and launch projector URLs.

Bam, developing for Android…from Android! Any time I’m not home but I want to get some Android development work in, I can just take out my Samsung Galaxy Tab S7. I’ve got a Bluetooth keyboard and a Bluetooth mouse (sidenote: if you’re using Projector, you’ll really want to use a mouse or trackpad. It doesn’t do well with touch input), so I can develop and debug without needing to switch devices and without having to lug around a much heavier laptop.

Problems

JetBrains Projector is still in pretty early development, so it’s not perfect.

  1. Sometimes it’s a little laggy when responding to things like scrolling and dragging, and controls can go wonky.
  2. Randomly, when viewing library code (either decompiled or in source view), the font weight gets really heavy and everything lags. This may have been fixed as of writing this, though.
  3. Some plugins won’t work properly. Since this isn’t a direct video stream, plugins like the embedded browsers just won’t display anything.
  4. There’s no X server support, and there probably won’t be any. This can make developing desktop and browser apps tricky, but you can always use an SSH tunnel with X forwarding and a local X server if you really need it.
  5. Sometimes the interface locks up and you need to refresh the page or even restart the server service to get it to work again.

And there’s more.

But is all that a dealbreaker? Certainly not for me. I’m perfectly fine with a slightly less polished experience (I use Android Studio Canary, after all), especially if it means I can offload all the compilation work to another computer and even develop for my tablet from my tablet.

Android Studio running on a Samsung Galaxy Tab S7 via JetBrains Projector


Even with its problems, I still really like JetBrains Projector. It makes developing from mobile possible, it moves resource load from a local computer to a remote one, and it’s also just really cool.

I know other IDEs, like Visual Studio, let you offload compilation to a remote computer, but that still requires you to have the IDE installed and running locally.

I’m personally really excited to see where JetBrains Projector goes from here because it’s already pretty incredible right now. Hopefully, they’ll be able to fix some of the problems I described above, but even now, Projector should be safe to use for production-ready projects.

If you want to try JetBrains Projector for yourself, here’s the link again to the installer and initial setup guide. If you want to set up Android Studio in Projector, here’s that link again, as well.

The post How to code in Android Studio from any device with JetBrains Projector appeared first on xda-developers.


from xda-developers https://ift.tt/2OwrrUY
via IFTTT

Samsung Galaxy S21 vs iPhone 12 Mini: Which small phone is for you?

Over the past few weeks, we’ve been testing Samsung’s brand new Galaxy S21 series against Apple’s iPhone 12 series, beginning with the middle one and then the biggest one. Now it’s time for the smallest ones to shine. If you dislike the trend of phones getting bigger and bigger, then the iPhone 12 Mini and the Galaxy S21 are both small phones (to varying degrees) that most people should be able to one-hand use with ease.

The iPhone 12 Mini and Samsung Galaxy S21 placed on a cushion

Samsung Galaxy S21 vs. Apple iPhone 12 Mini: Specifications and Comparison

Specifications Samsung Galaxy S21 Apple iPhone 12 Mini
Build
  • Aluminum mid-frame
  • Plastic back
  • Gorilla Glass Victus front
  • Stainless steel mid-frame
  • Glass front and back
  • “Ceramic Shield” for glass protection
Dimensions & Weight
  • 151.7 x 71.2 x 7.9mm
  • 171 grams
  • 131.5 x 71.5mm x 7.4mm
  • 133 grams (Global)
  • 135 grams (USA)
Display
  • 6.2″ FHD+ Dynamic AMOLED 2X display
  • 2400 x 1080 pixels
  • 421 PPI
  • 120Hz variable refresh rate
  • 20:9 aspect ratio
  • 1300nits peak brightness
  • HDR10+
  • 5.4″ Super Retina XDR OLED Display
  • 2,340 x 1,080 resolution
  • 476 PPI
SoC
  • International: Exynos 2100:
    • 1x ARM Cortex X1 @ 2.9GHz +
    • 3x ARM Cortex A78 Cores @ 2.8GHz +
    • 4x ARM Cortex A55 Cores @ 2.2GHz
  • USA: Qualcomm Snapdragon 888:
    • 1x Kryo 680 Prime Core @ 2.84GHz +
    • 3x Kryo 680 Performance Cores @ 2.4GHz +
    • 4x Kryo 680 Efficiency Cores @ 1.8GHz
  • Apple A14 Bionic SoC
Ram & Storage Options
  • 8GB + 128GB
  • 8GB + 256GB
  • 64GB (Ram not disclosed)
  • 256GB (Ram not disclosed)
Battery & Charging
  • 4,000mAh
  • 25W USB Power Delivery 3.0 fast charging
  • 15W wireless charging
  • 4.5 reverse wireless charging
  • No charger in the box in most regions
  • 2,227 mAh battery as per certification listings
  • 15W Wireless Charging with MagSafe
  • 7.5W Qi Wireless Charging
  • No charger in the box
Security Ultrasonic In-Display Fingerprint Scanner Face ID (TrueDepth camera for facial recognition)
Rear Camera(s)
  • Primary: 12MP, wide-angle lens, f/1.8, 1/1.76″, 1.8µm, OIS, Dual Pixel PDAF
  • Secondary: 12MP, ultra-wide-angle lens, f/2.2, 1/2.55″, 1.4µm
  • Tertiary: 64MP, telephoto lens, f/2.0, 1/1.76″, 0.8µm, PDAF, OIS
  • Primary: 12MP
  • Secondary: 12MP, Ultra-wide angle
  • Tertiary: 12MP telephoto
Front Camera(s) 10MP, f/2.2, 1.22µm, Dual Pixel PDAF 12MP, f/2.2
Port(s) USB 3.2 Type-C Proprietary Lightning port
Connectivity
  • Bluetooth 5.1
  • NFC
  • Wi-Fi 6
  • 5G
  • 5G: Sub 6GHz
    • mmWave for the USA
  • Ultra-Wide Band (UWB)
  • Wi‑Fi 6 (802.11ax) with 2×2 MIMO
  • Bluetooth 5.0
Software Samsung One UI 3.1 based on Android 11 iOS 14
Other Features IP68 IP68
Pricing Starts at $799 Starts at $699

Design: One is small; the other’s tiny

If you’re considering either of these phones rather than their bigger siblings, chances are you’re either looking for a small phone, or you just want to pay less money. Either way, the iPhone 12 Mini “wins” if those are the sole reasons. The Galaxy S21 is small, but the iPhone 12 Mini is downright petite. My average adult-sized hand can completely wrap around the Mini, and my thumb can reach all four corners without readjusting my grip. The Galaxy S21 still requires a slight thumb stretch if I really need to reach the top of the 6.2-inch screen.

The iPhone 12 Mini and Galaxy S21 front side by side held in hand

But the thing is, the Galaxy S21’s harder-to-reach upper corners don’t actually matter much in real-world usage because Android, unlike iOS, is well optimized for one-hand use. I’ve written about this before, but with Android, I can place apps only at the bottom of the screen; I can pull down the notification panel by swiping anywhere on the screen — unlike the iPhone, which forces you to swipe from the very top of the screen.

The iPhone 12 Mini and Galaxy S21 backs held in hand together

So in terms of purely using the phone one-handed, the iPhone 12 Mini doesn’t necessarily have an advantage just because it’s smaller. However, that smaller size and lighter weight still bring benefits — it fits into small pockets or onto gimbals/phone mounts easier.

The iPhone 12 Mini and Galaxy S21 The iPhone 12 Mini and Galaxy S21

In-hand feel is great for both, but the iPhone 12 Mini uses more premium materials due to its glass-and-aluminum sandwich design, while the Galaxy S21 cheaps out with a plastic back. Yes, Samsung indeed did a great job of coating the plastic to make it not feel like plastic, and some will even argue plastic is preferable over glass because it won’t shatter when dropped. But if plastic is so great, Samsung would have used it across the entire S21 series — the reality is the use of a plastic back is a cost-cutting move by Samsung. The haptics of the Galaxy S21 is also a clear tier below the excellent haptics of the Galaxy S21 Ultra. The iPhone 12 Mini, for what it is worth, keeps the flagship tier haptics.

5nm SoCs power both phones, and each phone zips through daily tasks with ease. Moving around to the front of the devices, it’s the same story as my other two previous Galaxy S21 series versus iPhone 12 series comparison: The Samsung Galaxy S21’s screen beats the iPhone 12 Mini screen by being higher res, faster-refreshing, and has less of an interruption.

The screens of the iPhone 12 Mini and the Galaxy S21

It's true that Samsung did a great job of coating the plastic to make it not feel like plastic ... but the reality is the use of plastic back is a cost-cutting move

Cameras: Capable setups, but clearly a tier below the bigger siblings

Let’s start with the good: both the Galaxy S21 and iPhone 12 have rock solid 12MP wide and ultra-wide cameras. They focus fast, produce lively shots, find the right dynamic range without needing manual tweaks, and generally produce great shots in most lighting conditions. The iPhone 12 Mini’s shot tends to be warmer, while the Galaxy S21’s camera is cooler, with punchier colors. If we examine the photos below, we can see the Galaxy S21’s sensor pulls in more light, but as a result, the iPhone 12 Mini shots have better contrast.

Galaxy S21 iPhone 12 Mini Galaxy S21 iPhone 12 Mini Galaxy S21 iPhone 12 Mini Galaxy S21 iPhone 12 Mini

It’s the zoom system where we see that clearly, both Apple and Samsung decided to hold back here for the sake of keeping costs down. The Galaxy S21 uses a 64MP telephoto zoom lens that can do 3x optical zoom and digital zoom up to 30x, but really anything beyond 10x looks a bit too blotchy to be used.

Still, the lesser zooming system of the Galaxy S21 is still much better than the iPhone 12 Mini, which straight up doesn’t have a zoom lens at all, and its digital zoom maxes out at a measly 5x.

a reference shot captured by the iPhone 12 Mini Galaxy S21 5x zoom iphone 12 Mini 5x zoom

If I blow up the 5x shots to 100% view on a monitor, it’s not even close.

iPhone 12 Mini vs S21 shots

5x zoom, 100% crop, Galaxy S21 (left) and iPhone 12 Mini (right).

I did not do a specific video test between the iPhone 12 Mini and the Galaxy S21, but I did do an iPhone 12 versus Galaxy S21 Plus video comparison just last week. Considering the camera systems are identical between the iPhone 12 and iPhone Mini, and between the Galaxy S21 and Galaxy S21 Plus, that means results from that video pretty much applies here.

The iPhone 12 Mini is a slightly more capable video camera, particularly at night.

Battery life: Not enough Apple juice

Even though the Galaxy S21 refreshes at twice the rate, its larger battery cell allows it to offer slightly better battery life than the iPhone 12 Mini. Neither phone can quite last an entire 12 to 14-hour day for me — keep in mind I’m a heavy user — but the iPhone 12 Mini consistently runs out of juice for me well before my night is over, whereas the Galaxy S21 can at least hang on until near the end.

Final Thoughts: The iPhone 12 Mini is a better flagship

The iPhone 12 Mini still feels very much like a top Apple phone, just smaller

In my earlier comparison pitting the Galaxy S21 Ultra against the iPhone 12 Pro Max, I gave the overall win to Samsung, because I felt the Galaxy S21 Ultra offered more value. Here, it’s the reverse: the iPhone 12 Mini still feels very much like a top Apple phone, just smaller. But the Galaxy S21, with its plastic back and clearly weaker haptics? It feels far away from the Galaxy S21 Ultra as a premium offering. Throw in the fact that the iPhone 12 Mini is $100 cheaper, and I’d personally say the iPhone 12 Mini is a better buy if you want a small phone and are open to both eco-system.

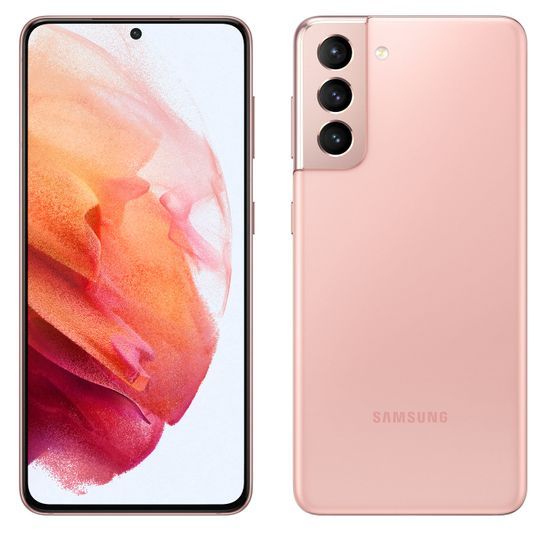
    Samsung Galaxy S21
    The Samsung Galaxy S21 is the starting point of the new 2021 flagship series, packing in a flagship SoC, along with a decent display and camera setup.
    iPhone 12 Mini
    The iPhone 12 Mini is the smallest flagship in years. Despite it’s petite size, it packs arguably the most powerful SoC in smartphone right now, along with one of the very best cameras.

The post Samsung Galaxy S21 vs iPhone 12 Mini: Which small phone is for you? appeared first on xda-developers.


from xda-developers https://ift.tt/3vcN4uC
via IFTTT

samedi 6 mars 2021

Play PUBG Mobile and other Android games with a controller using Mantis Gamepad

Mobile gaming has taken a huge leap over the past few years. With improvements in hardware and graphics technologies as well as various software innovations, one can enjoy high-quality games capable of matching (if not better than) some of the gaming consoles in the market. We also have a variety of game streaming services, including NVIDIA GeForce Now, Google Stadia, Xbox Game Streaming, etc., that let you enjoy AAA gaming titles by just streaming them on your smartphone using high-speed internet.

The one thing that is still a big pain point for mobile gamers is support for physical controllers on smartphones. We’ve seen some mods and support for certain controllers, but none of them provide a seamless experience unless you are using a streaming service. Not to mention some of the biggest mobile games, including PUBG Mobile and Genshin Impact, don’t officially offer support for physical controllers, at least not on Android.

That’s where Mantis Gamepad Pro comes in. Mantis Gamepad is a keymapping tool for Android that claims to that protect you from getting banned and promises compatibility with almost any Android game. The best part of the app is that you don’t need to root your device to make it work.

What is Mantis Gamepad Pro?

Mantis Gamepad Pro is a keymapper app for Android that is claimed to be ‘modern and safe.’ Currently available in beta on the Google Play Store as well as from the team’s own website, it features a ‘Universal Touch Mapping’ feature that lets you play almost any Android game with a physical game controller.

As per the developers, Mantis has been made with data safety and integrity in mind. It doesn’t request a lot of permissions, and the developers have made sure that the purpose of each permission is explained in the app itself. One of the most common issues while using game controllers with an Android device is the risk of getting banned, as most controller keymapper apps use cloning. Mantis says you won’t get banned in any games thanks to its design.

“It’s nearly impossible for an App/Game to detect whether Touch Mapping is being executed.” According to the developer, the Universal Touch Mapping feature uses Emulated Touch Injection which the system treats as identical to physical touch inputs. Thus it should be indistinguishable from normal taps. Mantis makes this happen by initiating an ADB shell process via Android or PC. While overlays can be detected by most apps, the overlay running apps’ identity cannot be detected. This means that a game cannot ban a user as there are a variety of apps that include overlay use cases. To ensure there is no cheating, the app doesn’t offer the option of adding any Macros either, which would offer an unfair advantage in multiplayer games.

Other keymapper apps like Octopus, for instance, use an app cloning method that can get user accounts banned. Such keymapper apps clone games and run them within their own Sandbox. Most games today can easily detect whether they are running in a sandbox or not. Mantis is also said to readily support all your next-gen controllers to enable pro-level gaming on Android with precise controls. This means that the new controllers from Microsoft and Sony will indeed be compatible.

How to setup Mantis Gamepad Pro?

The app requires a small activation process that is done via ADB using a PC or Mac. Here’s how to set up Mantis Gamepad Pro:

  1. Download the Mantis Gamepad Pro app from the Google Play Store on your Android smartphone over here.
  2. Head over to this link and download the MantisBuddy Package on your Mac or Windows PC.
  3. Enable USB Debugging on your Android device.
    1. Go to Settings > About > Tap on Build Number (or MIUI Version) repeatedly until it displays you’re a developer.
    2. Go back and open Developer Settings, available under System or Additional Settings.
    3. Turn on USB Debugging.
  4. Connect your Android device to your PC/Mac via USB Cable.
  5. Extract the MantisBuddyForWindows.rar (MantisBuddyForMacOS.zip for Mac) file into any folder. You should see a few ADB files along with MantisBuddy files.
  6. Run ActivateBuddy.bat (ActivateBuddy.command for Mac), which should automatically run the entire process of activating the app on your device. Tap on the Allow/Trust/OK button and tick ‘Allow always for this Computer’ if you get a debugging authorization pop-up on your device.
  7. You should see the ‘Mantis Buddy Connected’ message once the process is complete.

Mantis Gamepad Pro Beta - Free & No-Root KeyMapper (Free, Google Play) →

For Windows users:

Extract MantisBuddyForWindows.rar into any folder. If you’re using Windows 7 or below/or you’re facing any issues, make sure you install the Universal ADB Driver first. If MantisBuddy cannot recognize your Android device, you need to install the respective USB Driver of your device on your PC.

For Mac users:

Follow the same instructions as Windows. When you run ActivateBuddy.command for the first time, you may encounter an error saying that “ADB can’t be opened because it is from an unidentified developer”. If so, set System Preference > Security & Privacy > Open Anyway. In case this process doesn’t work, set System Preference > Security & Privacy > Allow apps downloaded from: Anywhere.

If you don’t see the Anywhere option, open Terminal and type sudo spctl –master-disable and hit return then input your password (different from the usual password interface with *****, here you can’t see anything from your input) and return.

Mantis is also the only keymapper on the Google Play Store that doesn’t require a PC for ADB connection. The latest update now allows you to activate the app via ADB by connecting to an Android device using a USB cable.

Experience

I personally tested the Mantis Gamepad Pro with a Logitech F310 wired controller and the new Sony DualSense Wireless controller via Bluetooth. The entire process is fairly simple, even for someone who is not aware of how ADB works. The user interface is clean and easy to understand. There is a dark theme option, with well-defined instructions and an FAQ section, to help users troubleshoot easily.

The app is supported on devices running on Android 7.0 or above. However, I could not get the screen overlay feature to work on the ASUS ROG Phone II that is currently running on Android 10. I spoke to the developers and was told that there have been a few reports from users facing the same issue, which are currently being investigated. I didn’t face any issues on my OnePlus 8 running on Android 11 though. We also didn’t have any issues using it on a Pixel 4 running Android 11.

Calibration is pretty seamless wherein you tap all the buttons one by one on your controller including the thumbsticks to assign various functions. Once you have configured the controller, you have to map those keys onto the touchscreen controls. This can be done by adding games to the app and running them through Mantis itself. Once you add and open a game through Mantis, suppose PUBG Mobile, you should see a small overlay on the top left corner.  To map your controls, open the game’s touch-based control layout and then tap on the Mantis floating widget and hit the ‘+’ sign to add a D-Pad, face keys, or the left and right thumbstick, and even the opacity. You can assign as many buttons as you want, depending on the controller that you have. It takes a while to map every single function, but it is just a matter of loading them once you are done.

I tried a bit of PUBG Mobile with the Logitech F310, and overall I didn’t face any latency issues. Considering I’ve always played the game using touch controls, there is a learning curve when you move to physical controls. You can’t completely navigate the game menus and various other options without going back to the touch screen. It is only when you enter a match where the physical controller actually made sense to me.

I believe the developers of Mantis Gamepad Pro have done a fine job on the app. Apart from a few issues like compatibility with certain smartphones, the Mantis Gamepad Pro could soon become a role model for other keymapper apps. You can follow the development of the app by heading to the official XDA Forum page.

The post Play PUBG Mobile and other Android games with a controller using Mantis Gamepad appeared first on xda-developers.


from xda-developers https://ift.tt/3ej8O1J
via IFTTT

Here are six things iOS 15 could learn from Android 12

Apple’s iOS 14.5 beta has just recently gone live, and while it brings some incremental improvements to the iOS software that ran out of the box in the iPhone 12 series, we here at XDA feel iOS still has some ways to go before matching Android in usability (okay, fine, we may be just a bit biased…).

With the next new version of iOS (15) likely being unveiled in June and launching with the iPhone 13 series (or whatever Apple ends up calling it) in September or October, Apple software engineers have a few months to hopefully improve iOS even more. Several of us at XDA carry use both, an iPhone and Android regularly, so here are some Android features we hope iOS 15 should offer.

Better Notification Management

I often wake up to dozens of notifications from Gmail, WhatsApp, and Telegram. If my daily driver is an Android, I see just three notification cards — one for each app — because Android groups all notifications from one app together. I can expand and view each individual message if I so choose, but until I do that, my notifications remain neatly organized.

If I happen to have my main SIM in my iPhone at the time, however, then it’s anything goes. Apple’s software is supposed to group my messages together, but it still breaks from that if the messages are spread over a couple of hours apart. Take, for example, the below screenshots: Android grouped all my Telegram messages into one card, while the iPhone showed me two boxes for Telegram messages sent a minute apart. Also, notice the two cards for two Gmail notifications.

Android 12 Notification Management System iOS Notification Management System

Anyone who receives a fair bunch of notifications throughout the day would agree that the notification management is in need of a few fixes, and iOS could do well at copying Android over here.

Free Homescreen Grid

The iPhone 12 Pro Max is an unwieldy phone to use with one-hand. But while some would attribute that to the nature of using a big phone, I disagree. I can use a similarly-large Samsung Galaxy S21 Ultra or LG Wing with one hand and not struggle much, because I can customize the Android homescreen to adapt. For example, I place all my app at the bottom of the screen, and I use a grid with more horizontal spots so I can fit more than, say, four apps in a row.

iOS doesn’t let me do this: the app homescreen grid is fixed whether I’m using a 6.7-inch iPhone 12 Pro Max or a 5.4-inch iPhone 12 Mini, and apps must start at the top of the screen in left-to-right order direction. Take a look at the photo below and tell me which phone looks easier to use with one hand. Reaching Spotify on the iPhone in the photo requires me to loosen my grip so I can stretch my thumb.

Apple iPhone 12 Pro Max and Samsung Note 20 Ultra side by side

“Just use Reachability or place more widgets on the homescreen to push apps further down the screen then,” some of you may say. No! Both of these are compromises. I shouldn’t have to find workarounds just to be able to reach my apps with ease.

Rotate Suggestions

Both Android and iOS offer the ability to lock portrait orientation so apps don’t rotate automatically when a phone is tilted sideways. This comes in particularly handy when using the phone while laying in bed. However, on iOS, the lock is set in stone. This means if my portrait orientation lock is on, and I want to view a video in landscape orientation, I must jump into the control center and turn orientation off.

Android, beginning with Pie (aka version 8), offered a smart feature called “rotate suggestions,” which allows us to override portrait orientation lock when playing widescreen videos. This happens automatically — whenever I play a video or tilt my phone sideways while using an app that supports landscape mode, a small icon appears in the corner asking if I want to rotate to landscape orientation. A tap will do so; or I can ignore it and the suggestion will stay out of the way. This context-aware UI makes a phone feel “smarter,” not to mention it genuinely comes in handy for using a smartphone in bed.

Android Rotate Suggestions

iOS offers nothing of this sort. While yes, this is not a feature whose absence will ruin your smartphone experience. But I do believe this is a feature that does add that nice finishing touch that one expects to see on a mature OS.

Predictive Dialing

This may make me sound old, but I still make phone calls. On Android, as soon as I start typing a number, the dialer will begin scouring my contacts list for that string of numbers as well as lookup combinations for the names under T9 dialing. This way, by the time I’ve input just the second or third number, the dailer would have already popped up the full contact info of the person, and from there I can just tap on the name to call.

iPhones, as of now, still cannot do this. In fact, iOS will not show the name of the contact until you’ve input the phone number in its entirety. Even if you’re one number off, iOS won’t budge. See the below screenshots for an example: on an iPhone, it wouldn’t show my girlfriend’s contact until I’ve finished inputting all eight digits of her phone number; on an Android, the dialer had already identified her contact by the second number.

iOS Predictive Dialing iOS Predictive Dialing iOS Predictive Dialing Android Predictive Dialing

And iOS wouldn’t even search through for T9 Dialing. If you have to search a contact by their name, you need to jump into the Contacts tab and use the search bar. It’s really inconvenient, especially if you have gotten used to dialing up contacts with such a breeze on Android.

Double Tap to Wake vs Single Tap to Wake

Ever since the iPhone X removed the home button, Apple has introduced a software feature named “Touch to Wake,” which as the name implies, allows a user to wake the screen by tapping on the screen. This is good because touching a screen to wake the phone is more convenient than pressing the power button. But Android has an even superior solution: double-tap to wake.

Requiring two consecutive taps to wake a screen makes it harder to accidentally trigger. I walk around town holding my phone in my hand often (even when I’m not using it), and I dislike that the iPhone screen will occasionally light up when I didn’t intend it to because my palm had touched the screen. This doesn’t happen on my Android devices.

(Also shout out to LG for introducing “double tap to wake” years before Google, Samsung, Oppo, and Xiaomi adopted it. Another shout out to custom ROMs that have packed in this feature for years as well. We couldn’t trace who brought the feature first.)

Better File Management System

Downloading a file to your local storage for use later is a common practice in the computing space, and Android has given us the option to that since day one. iPhones, however, didn’t have a filing system at all until 2017’s introduction of iOS 11, and even now, the iOS filing system is relatively confusing.

For example, I can only download files from an email on an iPhone only if it was sent as a standalone attachment. If it was sent as part of a third party cloud storage like Google Drive, I cannot save that file to my iPhone’s internal storage without some major workarounds. On an Android, it doesn’t matter what app or service it is — if it’s a file, I can download it and have it saved in local storage.

iOS File Management System Android File Management System

We know Apple’s philosophy here, they restrict downloads so people who don’t know what they’re doing won’t stuff their phone with junk (think about how messy our parents’ computer download folders look). But for those of us who know what we’re doing, the option to download directly is far more convenient. Android does give storage apps far too much power, and there is some cut down happening with Scoped Storage, but even with those restrictions in place, Android remains the convenient OS of the two.


Of course, these are just our specific requests here from the team at XDA. There are likely many others we haven’t even touched on. What are some Android software tricks you want to see on iOS 15?

The post Here are six things iOS 15 could learn from Android 12 appeared first on xda-developers.


from xda-developers https://ift.tt/3sQRCEX
via IFTTT

vendredi 5 mars 2021

Realme Narzo 20 starts receiving stable Android 11 update with Realme UI 2.0

After letting select Realme Narzo 20 owners test drive the Android 11 update through an Early Access program in November, Realme is finally rolling out a stable Realme UI 2.0 update to its last year’s budget smartphone.

In a post over at Realme Community, the company has announced it has started rolling out stable Realme UI 2.0 based on Android 11 to the Realme Narzo 20. The update carries build version RMX2193_11.C.06 and is a substantial upgrade over the Realme UI 1.0 that the phone came running out of the box. In the new update, Realme Narzo 20 owners can look forward to all the standard Android 11 features as well as Realme UI 2.0 specific changes, including Chat Bubbles, Conversation Notifications, improved dark mode, support for third-party icon packs, improvements to default launcher, new photo editing tools, and much more.

The update has started rolling out to Realme Narzo 20 users in India. Realme says it’s pushing the update in batches, so don’t worry if you aren’t seeing any OTA notification on your unit just yet; it might take several days for the update to reach all devices. You can also manually check for the update by heading Settings > Software update.

Since the Realme Narzo 20 is just a rebranded version of the European Realme 7i, the firmware should be compatible with both phones. However, we don’t recommend flashing the firmware across different variants unless you’re an expert user and know what you’re doing. Realme recently opened up a Realme UI 2.0 beta for the Reamle 7i, anyway, so it shouldn’t take too long for your device to receive a stable update.

Toggles (hides content until expanded):

Realme UI 2.0 update changelog for the Realme Narzo 20

  • Personalizations: Personalize the user interface to make it your own
    • You can now create your own wallpaper by picking colors from your photos.
    • Third-party icons for apps on the home screen are now supported.
    • Three Dark mode styles are available: Enhanced, medium, and gentle; wallpapers and icons can be adjusted to Dark mode, and the display contrast can be adjusted automatically to ambient light.
  • High Efficiency:
    • You can now drag text, images, or files out of a floating window or from one app to another app in Split-screen mode.
    • Optimized the editing page of Smart Sidebar: Two tabs are displayed and the order of items can be customized.
  • System:
    • Added “Tone tunes”: Consecutive notification tones will be linked to form a single melody.
    • Optimized the user interfaces of Notes: New visuals are provided on the list and editing pages.
    • Added weather animations to provide you with a more interesting experience.
    • Optimized vibration effects for text input and gameplay.
    • Optimized “Auto brightness”.
  • Launcher:
    • You can now remove a folder or combine it with another one.
    • Added filters for “Drawer mode”: You can now filter apps by letters, install time, or usage frequency to quickly find an app.
  • Security and Privacy:
    • You can now turn “App lock” on or off in Quick Settings.
    • Added “Low battery message”: When your phone battery is lower than 15%, you can quickly send a message to share your location with specified people.
    • More powerful SOS functions
    • Emergency info: You can quickly display your personal emergency info to first responders. The information can be shown even when your screen is locked.
    • Optimized “Permission manager”: You can now choose “Allow only once” for sensitive permissions to better protect your privacy.
  • Games:
    • Added Immersive mode which reduces disturbances while gaming so you can stay focused.
    • You can change the way to summon Game Assistant.
  • Communications:
    • You can share your personal hotspot with others via a QR code.
  • Photos:
    • Optimized the photo editing feature with upgraded algorithms and more markup effects and filters.
  • HeyTap Cloud:
    • You can back up your photos, documents, system settings, WeChat data, and more, and easily migrate to a new phone.
    • You can select the types of data to be backed up or restored.
  • Camera:
    • Added shortcuts to instantly share and edit photos or videos you just took.
    • Added the inertial zoom feature which makes zooming smoother during video shooting.
    • Added the level and grid feature to help you compose videos.
  • realme Lab:
    • Added Sleep Capsule, help you schedule downtime and secure your sleep time
  • Accessibility:
    • Added “Sound amplifier”: You can amplify faint sounds in the environment and soften loud sounds when wearing earphones.

The post Realme Narzo 20 starts receiving stable Android 11 update with Realme UI 2.0 appeared first on xda-developers.


from xda-developers https://ift.tt/2OpLO6k
via IFTTT