LightBlog

jeudi 3 juin 2021

The Best Android Keyboard Apps: Gboard, Swiftkey, Chrooma, and more!

The keyboard is probably one of the most used apps on any Android device, and possibly also one of the most underappreciated ones. Most of the time, you’ll be perfectly content with the keyboard that comes pre-installed on your device. But that’s until you discover that there are so many awesome keyboards out there that can really take your typing experience to the next level. It’s easy to become complacent with what comes pre-installed and stick with it forever — even if it’s not the best option. But why settle for something mediocre?

We’ve compiled a list of the best keyboard apps Android has to offer to help you type faster, with less effort, and also look good while at it. These keyboards have years of experience and user feedback behind them. They know their job very well. Besides offering to correct your spelling mistakes, they also suggest the right words at the right time, and some of them even automatically fetch one-time-passwords from your SMS app and offer a wide range of customizations.

Gboard

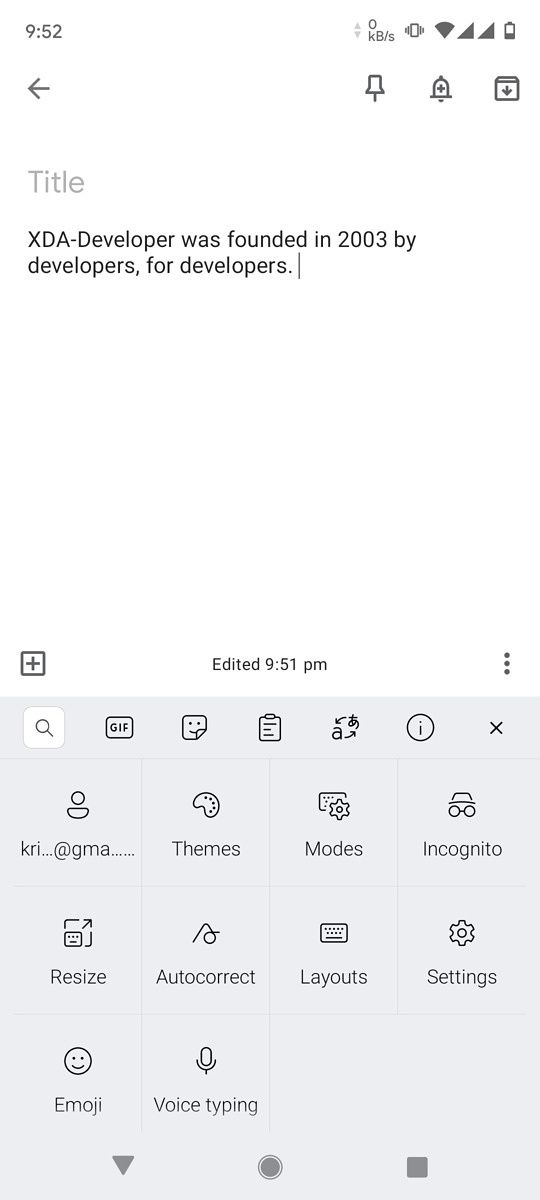
Gboard used to be a pretty vanilla keyboard, but steady feature additions and improvements over the past couple of years have made it one of the best in the business. Accurate word predictions, smooth glide typing, nifty gesture controls for cursor and deletion, Google Assistant and Google Translate integration, and multilingual typing are some of the main reasons why Gboard should be your default keyboard. Since it’s a Google app, it’s always getting better.

Using Gboard in Google Search app to search for the term XDA Gboard quick settings: theme, clipboard, text editing, One-handed mode, Floating keyboard Gboard stickers

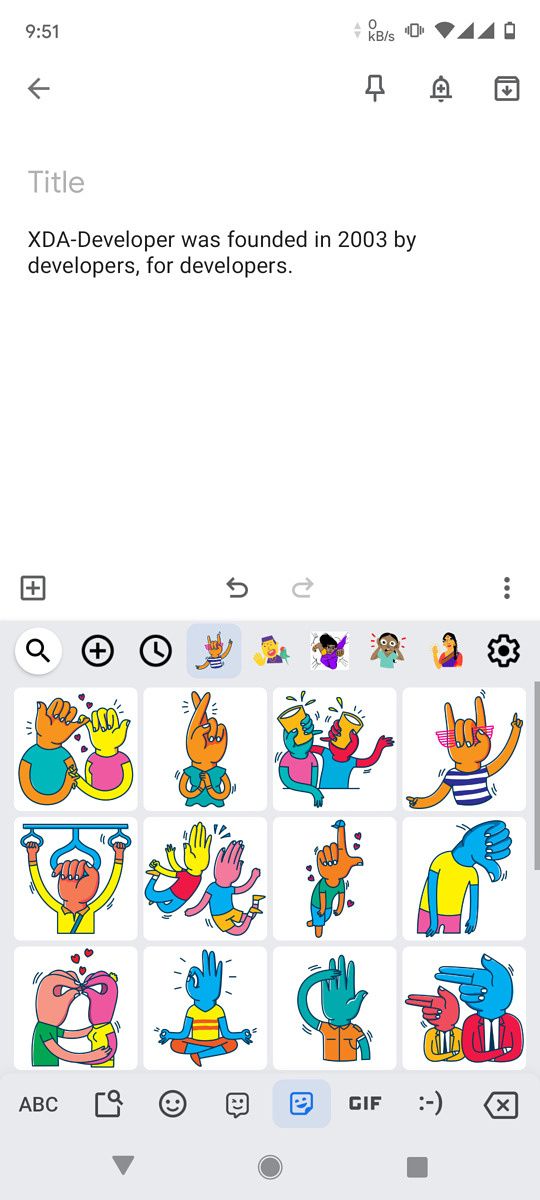
For example, Google is testing a new feature in the app that will make it even more convenient to quickly access clipboard content, while in Android 12, the keyboard will sync its theme with your wallpaper. The sluggishness and laggy experience that many users had complained about are gone too. It’s now as fast and smooth as it can get.

Gboard - the Google Keyboard (Free, Google Play) →

Swiftkey

Swiftkey has been around since the old days of Android and remains the most versatile and feature-packed keyboard you can get on the Google Play Store. Customization is the name of the game with Swiftkey, and there are tons of options and controls to really make your keyboard your very own.

Typing in Google Keep with Swiftkey Swiftkey's quick settings: themes, modes, incognito, resize, autocorrect, settings, etc. Swiftkey's various keyboard layouts

The thing I like the most about Swiftkey is that all essentials are accessible right from the keyboard. Like Gboard, it also has a quick access bar at the top with shortcuts for GIFs, stickers, clipboard, and translator. The word predictions and auto-correct have gone a bit off lately, but hopefully, this will be fixed with updates.

Microsoft SwiftKey Keyboard (Free, Google Play) →

Chrooma

If there was ever an RGB equivalent of PC keyboards on Android, it would have to be Chrooma. Chrooma’s main attraction is that it adapts to the primary color scheme of the app you’re using. It turns green when texting in WhatsApp, orange while in Gmail, and so on. It comes with dozens of skins and color palettes, including a cool RGB theme. There’s never a dull moment while using this keyboard.

Typing "Pizza" in a food delivery app with Chrooma keyboard Various color skins and themes of Chrooma keyboard Chrooma's RGB theme

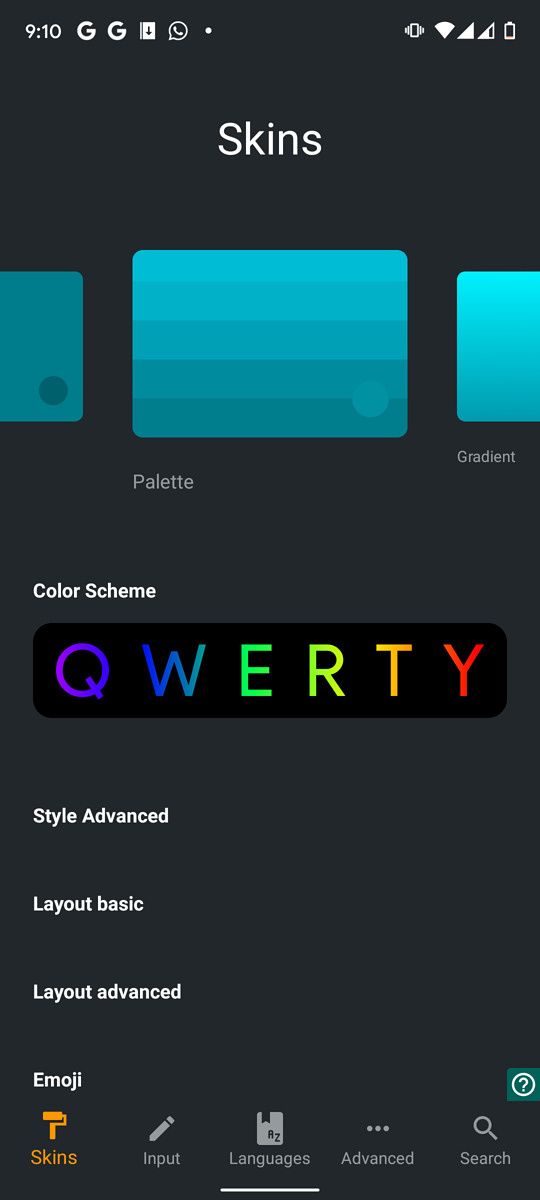
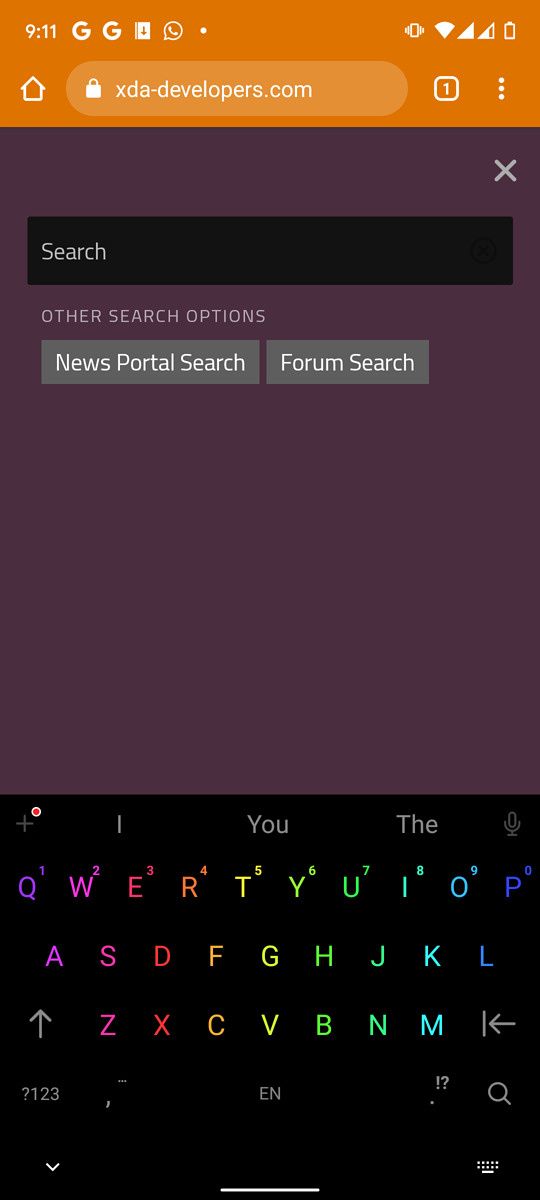
If you ever get bored of the monotonous look of Gboard or your stock keyboard, this is the one that will refresh your typing experience. Besides colors and adaptive themes, Chrooma also has an extensive set of useful features, including gesture typing, AI-powered contextual word predictions, One Hand Mode, split layout, Night Mode, and many more.

Chrooma Keyboard - RGB & Emoji Keyboard Themes (Free+, Google Play) →

Fleksy

Fleksy has everything and the kitchen sink. Its autocorrect game is solid, and the clean design will make you feel right at home if you’re coming from Gboard. Apart from offering all keyboard essentials, Fleksy has some unique add-on features, called Extensions, that you’ll not find in other keyboard apps. You can add a row of the most frequently used emoji, symbols, URLs, etc.; make the keyboard completely invisible; add cool typing effects; create shortcuts for words and phrases, and so on.

Setting up Fleksy keyboard Various themes of Fleksy keyboard Fleksy keyboard extensions

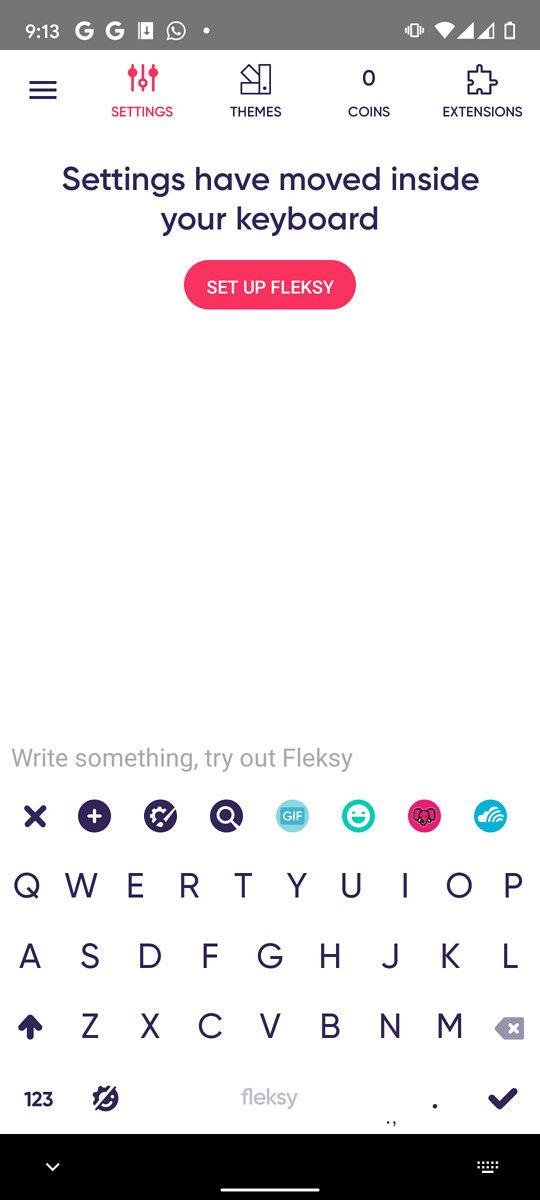
Fleksy also offers what it refers to it as mini-apps, which lets you browse and share GIFs, memes, stickers, YouTube videos, etc., right from the keyboard. Fleksy has over 100+ themes designed by popular artists, and you can also create your own using a photo from your gallery or Unsplash library.

Fleksy Free keyboard Themes with Emojis Swipe-type (Free+, Google Play) →

Grammarly Keyboard

Many of us have the Grammarly extension installed in our PC browser to keep our emails and writing free from grammatical errors and spelling mistakes. The Grammarly Keyboard brings the same peace of mind to your phone. Sure, it’s not the most feature-packed keyboard out there, and you’ll miss out on stickers, GIFs, themes, etc. But that’s not the reason to use Grammarly Keyboard in the first place. Grammarly Keyboard is for those who care about language and grammar above anything else.

Grammarly Keyboard correcting a spelling mistake in a sentence Grammarly Keyboard language settings: Tone detection, Auto-correction, Auto-capitalization, Swipe to Type, Predictive Text, etc. Grammarly Keyboard settings: Theme, Key borders, Number row, Keyboard height etc.

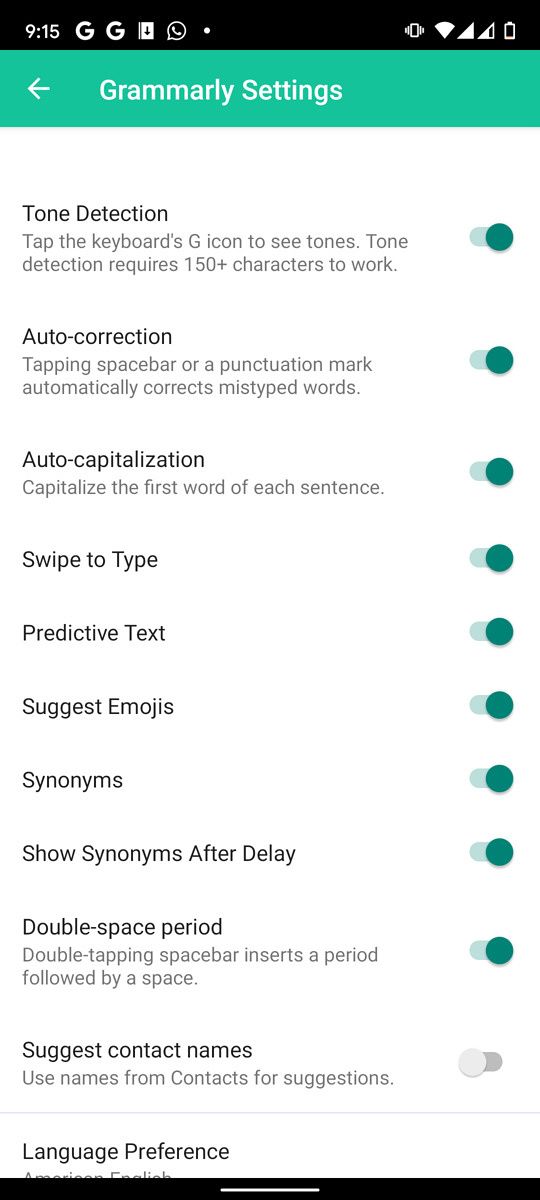
Grammarly’s dead-accurate grammar and spell checker will catch most, if not all, of your embarrassing mistakes while also showing you the correct form and usage, so you learn from it and hopefully don’t repeat them. The free version of Grammarly Keyboard gets the job done for casual usage. There’s a premium subscription plan for more serious use cases that provides suggestions on more advanced grammatical issues, tone detection, word choice, fluency, and more.

Grammarly Keyboard - Grammar Checker and Editor (Free+, Google Play) →

Simple Keyboard

Simple Keyboard is, well, very simple. It’s truism, but it’s worth stating because that’s what the Simple Keyboard is all about. It gives you a simple, clutter-free keyboard that doesn’t bombard you with gimmicky features or ask you to hand over your data to “improve your experience.” It weighs about 1MB in size and doesn’t ask for any sensitive permission — in fact, it only needs a single permission: for haptic feedback.

Using Simple Keyboard in Google Keep Simple Keyboard Appearance & Layouts: Theme, Set custom keyboard color, keyboard height, etc. Simple Keyboard preferences: Auto capitalization, SHow seperate number row, Hide special characters, etc.

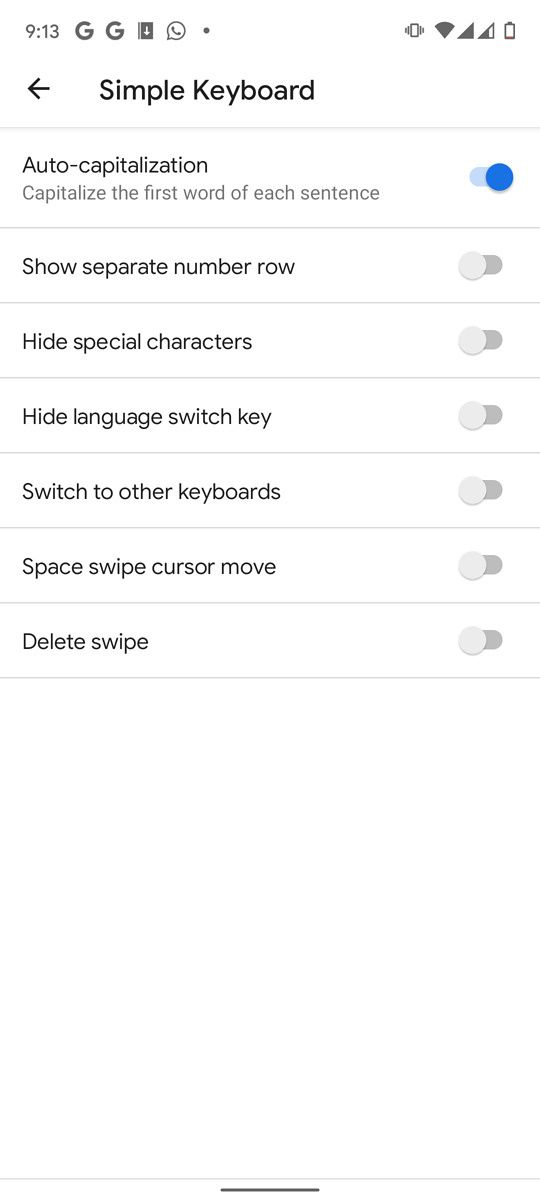
Since simplicity, privacy and speed are the main focus points here, the keyboard does away with features like emoji, GIFs, spell checker, and gesture typing. It’s not for mainstream users, but those who care deeply about privacy will certainly find this a great choice.

Simple Keyboard (Free, Google Play) →


These are the best Android keyboard apps that will help you type faster, better, and with less effort. Which keyboard you should pick from the list is your own personal decision. There’s no one size fits all — although some come quite close to it — we’re pretty sure you’ll definitely find your soul keyboard among our recommendations. My personal favorite is Gboard, and I use it on all my Android phones. When I get bored, I also take Chrooma and Fleksy for a spin from time to time.

Whatever keyboard app you end up picking, be sure to give your brain some time to adjust to a new keyboard, as it will take a few days to unlearn the old habits you developed with your old keyboard. If you’re looking for more recommendations, we also recommend these great Android apps, and these amazing Android games.

The post The Best Android Keyboard Apps: Gboard, Swiftkey, Chrooma, and more! appeared first on xda-developers.


from xda-developers https://ift.tt/2FRzN2f
via IFTTT

Mark Zuckerberg confirms multi-device support is coming to WhatsApp soon

WhatsApp is the world’s most popular instant messaging service. Despite dominating the space for many years, the Facebook-owned messaging service has started to feel the heat from consumers and competitors. Controversial changes to WhatsApp’s privacy policy triggered many users to migrate to other platforms like Signal and Telegram in the search for more respect for privacy. The outrage does not seem to subside in spite of multiple attempts by WhatsApp to convey how much it values users’ privacy. On the sidelines, WhatsApp is continuing to add new features, and the company’s executives including Facebook head honcho Mark Zuckerberg have confirmed some key features making their way to the app and the most exciting one is support for multiple devices running the same WhatsApp account.

Along with multi-device support for up to four devices, WhatsApp will get some of Instagram’s features such as an app-wide disappearing mode and a “View Once” setting that will limit the views on any media to just one. These changes are arriving on the app in the coming months, as confirmed by WhatsApp CEO,  Will Cathcart, and Facebook founder and CEO, Mark Zuckerberg, in an interview with WABetaInfo.

Multi-Device Support

WhatsApp is tied to a phone number and limits users to using it on a single device, unlike other messengers such as Telegram, which are accessible from multiple devices at once. Even when you use WhatsApp on your desktop, all messages are routed through the smartphone, which needs an active internet connection for homing. Naturally, alternatives that do not have these restrictions are more enticing in this aspect.

To fix this, WhatsApp will soon be allowed to run on up to four different devices linked to the same account simultaneously. This should work even if the primary device is not connected to the internet but, the executives did not confirm how the feature would work. We did get a glimpse of multi-device support last year from none other than WABetaInfo on Twitter and the splash screen says there is a “login process.” WhatsApp CEO Will Cathcart, however, did confirm that the feature will roll out to WhatsApp beta in the “next month or two.”

This feature might finally open the possibility of a version of WhatsApp suited for the iPad, something that has been missed for quite some time.

View Once

If you exchange images or videos recorded on Instagram with other users via DMs, you would know that the media can be viewed only once — unless specified. This feature will now come soon to WhatsApp as “View Once,” wherein the media will disappear after being viewed by the person on the other end.

The feature was also predicted by WABetaInfo earlier. Its screenshot from a version of the app reverse-engineered by them, as seen below, disclaims that the receiver would still be able to take a screenshot before the media disappears.

Notably, View Once differs from the Self-destructing images, which vanish as soon as the user leaves a chat but can be opened countless times as long as they stay in one chat.

whatsapp view once disappearing image whatsapp disappearing mode

Disappearing Mode

WhatsApp rolled out Disappearing Messages to all users in November last year. The feature allows messages in a particular chat to get deleted automatically seven days after being sent. Following this, the messaging app will now get a Disappearing Mode, which will be an app-wide setting to change all chats to Disappearing ones. It is worth noting that the setting will only apply automatically to chats initiated after turning the feature on and not on the older ones.

Other features

Unlike multiple devices support, neither Cathcart nor Zuckerberg commented on a timeline for releasing these features. Since they have already been spotted earlier by WABetaInfo, we hope to see them soon. Alongside these promised features, the executives indicated the possibility of opening up the beta channel for iOS users once again.

Meanwhile, if you are an Android user and want to try these features before others, you can sign up for the beta on the Google Play Store.

Let us know in the comments what you think about these features!

WhatsApp Messenger (Free, Google Play) →

The post Mark Zuckerberg confirms multi-device support is coming to WhatsApp soon appeared first on xda-developers.


from xda-developers https://ift.tt/3wYGmZf
via IFTTT

OnePlus resumes Android 12 beta rollout for the OnePlus 9 series

OnePlus was among the first OEMs to release an Android 12 beta build to its devices. The company announced its Android 12 Developer Preview Program shortly after Google rolled out Android 12 Beta 1 to its Google Pixel lineup, and it released the first beta build soon thereafter. However, the Android 12 Beta 1 build for the OnePlus 9 series ended up bricking devices, and OnePlus had to halt the rollout. The company is now rolling out a hotfix build for the OnePlus 9 series, which addresses the issues found in the previous build.

According to a recent post on the OnePlus Community forums, the company has now started rolling out a new Developer Preview build for the OnePlus 9 and the OnePlus 9 Pro. The Android 12 beta build includes a fix for the issue that caused the original release to get stuck during Factory Reset Protection (FRP) check. Other than that, the beta build is pretty much the same in terms of features.

The post also highlights some known issues in the latest Android 12 beta release for the OnePlus 9 series, including:

  • All data will be cleared while flashing the build
  • Video call function is not available
  • Fingerprint unlock and face unlock are unavailable
  • Certain UI screens look less than desirable
  • Some apps may not function as expected
  • System stability issues
  • Probability of camera crash when HDR mode enabled.

OnePlus has further cautioned users that installing the Android 12 beta update still poses a risk of bricking your phone. Therefore, you shouldn’t install the firmware on your phone if you’re not sure what you’re doing. If you still wish to go ahead, follow the instructions given in the post to download and install the build on your OnePlus 9 or OnePlus 9 Pro. In case you encounter any issues during the process, you can easily roll back to the Android 11 release by flashing the rollback packages linked in the forum post.

The post OnePlus resumes Android 12 beta rollout for the OnePlus 9 series appeared first on xda-developers.


from xda-developers https://ift.tt/3wYAAH3
via IFTTT

These are the Best Android Phones to buy in June 2021: Galaxy S21 Ultra, OnePlus 9, ROG Phone 5, and more!

June is as good a time to buy an Android phone as any — all the spring flagship releases have been announced and reviewed, giving you an idea of what each phone brings to the table, and it’s also not so late in the year that you might as well wait for the fall releases. In 2021, we got arguably more excellent spring releases than ever before. So, here’s XDA’s expert guide on the best Android phone for you depending on your need.

Navigate this guide:

Best Android Phone Overall: Samsung Galaxy S21 Ultra

Samsung Galaxy S21 Ultra in black

Last year’s Galaxy Note 20 Ultra was our pick for best Android phone of 2020, so it’s no surprise the Galaxy S21 Ultra — which improves on the Galaxy Note 20 Ultra in several ways — has dominated the top of this list this year so far.

To be honest, it’s going to be tough for other phones to knock the Galaxy S21 Ultra off the list because it’s a near-flawless slab smartphone with a lot of extra factors on its side. Not only does it have the latest flagship processor, the most versatile camera system, a premium and unique design, but it’s also got that Samsung marketing and distribution, it’s also the Android phone with the most visibility and availability worldwide. This last part matters because even though the Xiaomi Mi 11 Ultra comes very close to matching the Galaxy S21 Ultra spec for spec, the fact it’s not sold in a major chunk of the world (North America) ultimately limits its appeal. All these little things make the Galaxy S21 Ultra very, very hard to beat as “the best Android phone overall.”

    Samsung Galaxy S21 Ultra
    The Samsung Galaxy S21 Ultra is the ultimate overkill in the new 2021 flagship series, packing in a flagship SoC, a premium build, a great display, and an amazing camera setup, as well as all the extras expected on a premium flagship.

Best Samsung Galaxy Phones for every budget and need

Best Android Phone for most people: OnePlus 9

OnePlus 9 in purple

The Galaxy S20 FE held this spot for months, but its reign as the best Android for most people is up. The OnePlus 9 Pro is only slightly more expensive, but it’s got a newer SoC (Snapdragon 888), superior build quality (glass-and-aluminum sandwich instead of the plasticky S20 FE), and it has a better main camera.

The OnePlus 9, in fact, is almost as good as the OnePlus 9 Pro, save for not having quite as good an ultra-wide-angle camera, a plastic and glass build, and slower wireless charging. It still packs a gorgeous 120Hz OLED display, that aforementioned top-tier Qualcomm chip, and a Hasselblad color-graded main camera that produces sharp, punchy photos. This is a very capable almost-flagship for 2021.

    OnePlus 9
    The OnePlus 9 is the best phone to buy for most people, with a Snapdragon 888, 120Hz screen, and a glass-and-aluminum design

Best Android Phone for software and speed: OnePlus 9 Pro

OnePlus 9 Pro camera module

OnePlus is a brand that’s always been about speed, and the OnePlus 9 Pro is once again the fastest phone on the market. Everything – from near-instantaneous speed at which apps launch to how the notification panel whips up and down along with your finger swipes – even the UI here has been optimized for speed. All of that is backed by a super-fast 120Hz OLED panel too.

When it comes to OnePlus’ UI, OxygenOS, it’s not just about speed: it’s also, in my opinion, the best Android skin around, with plenty of customization and shortcut gestures galore. Want to use multiple different icon packs on one home screen? Or change the accent color scheme of your app drawer? Or quickly launch an app action by long-pressing the fingerprint sensor? OxygenOS offers more ways to use Android, even more so than Google’s stock UI.

The rest of the hardware is top-notch, with an excellent 50MP ultra-wide camera as a worthy companion to that new 48MP, Hasselblad color-graded main camera. Of course, you get Snapdragon 888, with UFS 3.1 storage, and some of the fastest wired and wireless charging around.

    OnePlus 9 Pro
    The OnePlus 9 Pro has the smoothest and most fluid UI around in Android -- and dare we say it, any phone.

Best point and shoot camera phone: Google Pixel 5

Best Android Phone – Google Pixel 5

Google’s Pixel series, even back when it was aspiring to be a premium flagship, never really fully got hardware right. Whether it was the original Pixel’s outdated bezels, Pixel 2 XL’s display problems, Pixel 3 XL’s giant, unsightly notch, or the Pixel 4’s mediocre battery life and wonky facial recognition system, every generation of Pixel has had a glaring hardware flaw that is difficult to overlook. But despite that, many reviewers and tech enthusiasts still gladly carried a Pixel over the years, because Google’s camera software processing was that good.

That camera prowess is why the Pixel 5 cracks this list, despite a spec sheet and hardware craftsmanship that sits a tier or two below other brands’ offerings listed here. But with the Pixel 5, you know you’re getting color science that is always on point, dynamic range perfectly balanced, and the best portrait/bokeh mode around. For the first time, we even get an ultrawide angle camera in a Pixel. Throw in the usual Pixel perks like the purest version of Android and Pixel-specific features from Google, and the Pixel 5 is an easy recommendation.

    Google Pixel 5
    Google's newest brings several new features, but the most important is that Pixel camera with its glorious image processing and dynamic range is back. If you just want to point, tap the shutter button, and expect a great shot, look no further.

Best Smartphone Cameras of 2021: Apple, Samsung, Xiaomi, OnePlus — We’ve tested them all!

Best Cheap Android Phone: Google Pixel 4a

Best Android Phone – Google Pixel 4a

If you want that Pixel 5 primary camera performance but want to save a bit, the Pixel 4a (not to be confused by the larger and more expensive Pixel 4a 5G) is one of the cheapest options on this list. Best of all, being a Pixel phone, this will be among the first devices to get that Android 12 update.

You lose out on the ultra-wide-angle camera and 5G connectivity, but you still have virtually the same primary camera as the Pixel 5. If it’s just standard 1x point-and-shoot photos, the Pixel series is hard to beat. If you want to see other choices on a budget, check out our guide to the best cheap Android phones.

    Google Pixel 4a
    The Google Pixel 4a brings virtually the same main camera as the Google Pixel 5, which means it's got one of the very best cameras on the market. Everything else about the phone is solid if unspectacular -- but at this price, and with a camera performance at this level, it's hard to complain.

Best overall camera phone: Huawei P40 Pro+

Best Android Phone – Huawei P40 Pro Plus

For a good half-year in 2020, the Huawei P40 Pro+ was the undisputed zoom camera king. However, Samsung’s recent release, the Galaxy S21 Ultra, has dethroned Huawei in the zoom game by a bit. With that said, however, the P40 Pro+ still has a superior low light camera (50MP RYYB sensor with a larger image sensor size than the Galaxy S21 Ultra’s 108MP sensor) and a sharper 40MP ultra-wide-angle camera, so one could argue it is still technically the most accomplished camera system all around.

However, Huawei’s image processing isn’t everyone’s cup of tea, so it really comes down to preference. But no matter what, the P40 Pro+ camera system is one of the most accomplished around even a year later. Unfortunately, the Huawei P40 Pro+ also cannot run core Google Mobile Services apps due to the ongoing sanctions placed by the US government, so be sure you weigh the pros and cons before considering one.

    Huawei P40 Pro+
    With a 10x optical zoom camera and an 40MP ultra-wide-angle camera, the Huawei P40 Pro+ has the most versatile and capable cameras on the market. The rest of the package is pretty premium too -- unfortunately, there's the Google ban issue to consider.

Best Android phone for Gaming: ASUS ROG Phone 5 Ultimate

ROG Phone 5 Ultimate

Last year’s ASUS ROG Phone 3 was our pick for gaming phone of the year, and this year’s update, the ROG Phone 5 Ultimate, is even better — thus making it an easy favorite for the best gaming phone of 2021.

So what makes the ROG Phone 5 Ultimate a gaming beast? Let’s start with the 144Hz display, which the handset can maintain without micro-stutters. Throw in a massive 6,000 mAh battery to handle that variable refresh rate, which means you won’t have to worry about finding a charger mid-day. Then add functional shoulder buttons named “AirTriggers” that give extra control to first-person shooters in ways most normal smartphones cannot, and the cool “ROG Vision” screen that adds a lot of flair to the device.

Of course, when you’re done gaming, the ROG Phone 5 works fine as a regular smartphone too, with a reliable camera system, Snapdragon 888, and up to 18GB of RAM. No app will bog this thing down.

    ASUS ROG Phone 5 Ultimate
    ASUS ROG Phone 5 Ultimate is, as the name implies, the ultimate gaming phone with up to 18GB of RAM.

Best Android foldable phone: Samsung Galaxy Z Fold 2

Samsung Galaxy Z Fold 2 review

This used to be a landslide win for the Samsung Galaxy Z Fold 2 in this category, considering the only other real options were the Huawei Mate XS, which is pricier, not on sale officially in the US, can’t run core Google apps, and has a folding-screen-on-the-outside design that looks stunning but raises serious durability concerns. The Galaxy Z Fold 2, meanwhile, is widely available, has no software restrictions, and has a firmer folding screen made of “ultra-thin glass” that is protected when not in use. The new Huawei Mate X2 does improve upon a lot and gives some real competition to the Galaxy Z Fold 2, but the Galaxy Z Fold 2 still takes the cake as most people can still comfortably buy and use the device, which remains a con for Huawei.

The Galaxy Z Fold 2 feels the most polished and refined of all foldable phones released so far and has won the hearts of several of us here at XDA already. Other than water resistance and perhaps a thinner build (neither of which are realistic requests at this time as the technology isn’t there yet), there’s not much you can fault the Galaxy Z Fold 2 for.

    Galaxy Z Fold 2
    The most cutting edge phone of the year -- but it will cost you a pretty penny. However, if money is no object and you need to have the very best that Samsung offers, look no further than the Galaxy Z Fold 2. We love it, and so will you!

Best Foldable Phones: The Top Folding Smartphones that you can buy right now

Best Android phone not sold in the US: Xiaomi Mi 11 Ultra

The Xiaomi Mi 11 Ultra with its 50MP main camera and a second screen

Xiaomi’s Mi 11 Ultra is its most expensive phone yet (not counting the yet-to-be-released Xiaomi foldable), but there’s good reason: the Mi 11 Ultra is a hardware beast, packing the brand new Samsung GN2 sensor with the largest image sensor in the industry, a very good 48MP ultra-wide camera, and a Periscope zoom lens that is just a hair below what the S21 Ultra’s Periscope zoom can do. Elsewhere, the phone has 67W wired and wireless charging (the charging brick is included with the box too) and of course, the Snapdragon 888 with plenty of RAM.

There’s even a second display on the back of the device, which means selfie lovers can snap self-portraits with the phone’s very capable main camera system.

    Xiaomi Mi 11 Ultra
    The Xiaomi Mi 11 Ultra is the company's most ambitious and powerful slab phone yet.

Second best Android phone not sold in the US: OPPO Find X3 Pro

OPPO Find X3 Pro

The OPPO Find X3 Pro is one of the most recent flagship Android releases and it’s great enough to take this top spot for phones not sold in the US. Featuring a true 10-bit panel and a unique back design, the Find X3 Pro is one heck of a looker.

We particularly love the Find X3 Pro’s ultra-wide-angle sensor, which uses the same 50MP Sony IMX 766 sensor as the main camera, which means ultra-wide angle shots look almost as sharp and rich as the main camera. Throw in the micro-lens that can double as a magnifying glass and the usual Snapdragon 888 and 12GB of RAM, and you have one of the most powerful and polished smartphones of 2021 so far. Its lack of a Periscope zoom lens does keep it a notch below the Galaxy S21 Ultra, however.

    OPPO Find X3 Pro
    OPPO's latest is a highly polished smartphone with a true 10-bit display that allows it to display over one billion colors.

Best for multi-tasking: LG Wing, Microsoft Duo

LG Wing, Microsoft Duo

LG Wing

If productivity is paramount, then two screens are obviously better than one. The LG Wing and Microsoft Duo take very different approaches to this dual-screen set-up. The Wing, in “normal mode,” resembles any other slab smartphone — it’s big, tall, curvy, with almost all-screen on its face. But give the bottom left side of the screen a little push and the front screen swivels, revealing a second screen in the backplate.

Microsoft Duo Second Screen

The Microsoft Duo

The Microsoft Duo meanwhile, is more like two screens connected together by a very premium hinge. The Duo folds and opens like a book, and unlike the Wing, both screens are the same size and quality.

Neither phone carries the most powerful SoC or best cameras, but these are productivity machines first and foremost. To be able to run, say, Slack on one screen with a word document or an email on the other is something most of us remote workers would enjoy.

Plus, with LG’s exit from the smartphone space, the LG Wing is now a potential collector’s item — it is the last LG smartphone to hit the market.

    Microsoft Duo
    The Microsoft Duo is an amazingly thin dual-screen device that opens and close like a book. While there were some software quirks at launch, Microsoft has fixed enough of it that the device is usable. If you need to run two apps at the same time often, this is one of the best options.

If we must pick the best overall phone here, it’d be the Samsung Galaxy S21 Ultra. However, for those who don’t mind importing, the Xiaomi Mi 11 Ultra rivals the Galaxy S21 Ultra in many areas (and wins in some). For those on a budget and who want the safest option, the Google Pixel 4a is still a good value smartphone stateside. But ultimately, if you have money to spend though, the Galaxy Z Fold 2 is still the ultimate device.

The post These are the Best Android Phones to buy in June 2021: Galaxy S21 Ultra, OnePlus 9, ROG Phone 5, and more! appeared first on xda-developers.


from xda-developers https://ift.tt/3laOeRA
via IFTTT

XDA Basics: How to take a Screenshot on macOS, using keyboard shortcuts, apps, and more!

Taking a screenshot is a necessary task on just about any device you use for work or play. Most users are well aware of how to take a screenshot on the most popular mobile phones. However, if you recently switched to Mac from Windows, you might be wondering how to take a screenshot on your new computer. Luckily, taking a screenshot is a very simple task in macOS.

In this article, we’ll take a look at how to take a basic screenshot, as well as some more advanced options. For those comfortable with Terminal commands, we’ll also see how to take a screenshot on Mac using this method. Lastly, we will take a brief look at how to store your screenshots in a custom folder for organizational purposes.

How to take a screenshot on Mac using Keyboard Shortcuts

The simplest way to take a screenshot on your Mac is to use the built-in keyboard shortcuts. All of our favorite Mac desktops and laptops have this functionality built-in. If you’re interested in capturing the entire screen on your Mac, simply press Shift-Command-3 (all buttons simultaneously). This will capture everything on your desktop and save the picture to your Desktop as a PNG file.

Often you may want to take a screenshot of a particular portion of your screen, to do this press Shift-Command-4. This command brings up a set of crosshairs that allow you to choose a portion of your screen with a quick mouse click. After highlighting the desired portion, simply release the mouse click and the screenshot saves to your Desktop.

By default, macOS will name your screenshot using the date and time it was taken. If you are interested in changing the name or file format of your screenshot, see the section below covering Terminal commands.

How to take a screenshot on Mac with third-party apps

There are also a number of solid third-party apps that can take and edit screenshots on your Mac. All of these apps offer basic screenshot functionality and add additional advanced tools based on your particular use case. Below are some of our favorite picks if you want to check out third-party options.

    Snagit
    Snagit is a paid app, but has the most advanced feature set on this list. This 3rd party tool offers the ability to create brilliant tutorials with your screenshots. You can add video, images, and GIFs to create a seamless experience. This is the best app for commercial use.
    Lightshot
    Lightshot is a free third-party app that offers a fast and easy to use interface. After capturing your screenshot, you can easily share to social media or save to your favorite cloud platform.
    SnapNDrag
    SnapNDrag is a paid app, with a price of $9.99, but it's well worth it. The ability to organize, annotate, and share screenshots is seamless. If you need to sync screenshots across devices or social channels, this is the app for you.
    Monosnap
    Monosnap offers a free version with a robust feature set. Featuring an 8x magnifier window, this is the app for pixel-perfect screenshots. In addition, you can set custom hotkeys and take delayed screenshots. There's a paid version with additional commercial features.

How to take and rename screenshots on Mac using Terminal

If you’re an advanced macOS user, you’ve likely used Terminal at some point. Terminal commands allow you to control your Mac on a more granular level, and also avoid using the mouse so much. The Terminal app is located within the Utilities folder on your Mac. Opening Terminal will display a simple command-line interface to enter text. To take an interactive screenshot using Terminal, type the command,

screencapture -i ~/Downloads/myScreenCapture1.jpg

and then press enter. This command will bring up the set of crosshairs to select the desired portion of the screen. After selecting the portion you wish to include, this command saves the file to your Downloads folder as a JPG file with the name ‘myScreenCapture1.’ From this, the main benefits of using Terminal for screenshots are clear — it is easy to change the file name, format, or saved location.

Terminal on Mac to capture screenshots

It’s worth noting that the ‘-i’ extension in the Terminal command above tells your Mac to take an interactive screenshot. This is the portion of the command that enables the crosshair selection tool. There are a number of other extensions you may want to use with this command in Terminal. For instance, adding the ‘ -x’ command will take a screenshot with no animation sound, and ‘-C’ will force the screenshot to show the cursor. It’s also possible to combine several command extensions simultaneously.

screencapture -ixC ~/Dropbox/myScreenCapture3.png

The command above saves your interactive screenshot to the Dropbox folder, the screenshot animation doesn’t make sound, and your screenshot will include the cursor. With Terminal commands, control over the screenshot function is much more precise, and you can even change default settings.

How to change the default file format or folder for screenshots using Terminal

After using Terminal to take a few screenshots, you might decide you want to manage your screenshots even more carefully by changing your default preferences. To change the default save location for screenshots use the command,

defaults write com.apple.screencapture location ~/Dropbox/Screenshots

with the desired folder in place of ‘Dropbox/Screenshots.’

Changing the default save folder for screenshots using Terminal

This is a very convenient option for automatically saving your screenshots to a folder in the cloud, as I’ve done in this instance. In addition to the default folder, you may also wish to change the default file format for screenshots. The default format can be easily modified to PDF, JPG, TIFF, or GIF format. For example, to change the default screenshot format to JPG, use the following command.

defaults write com.apple.screencapture type jpg

Replacing the JPG extension with any of the other formats will generate a similar result. As you can see, it’s quite simple to take full control of your screenshot output using Terminal on Mac.

changing the default file format for screenshots using Terminal


There are many ways to take a screenshot on Mac. If you’re simply after basic functionality, you’re fine sticking with the built-in keyboard shortcuts. For those looking for a dedicated tool for work, many of the third-party apps offer excellent annotation and sharing features for social media and cloud integration. Using the Snagit app, you can even add picture-in-picture to a tutorial using one of our favorite webcams for Mac. Advanced users will love taking control of every aspect of the screenshot experience using Terminal commands. Whichever method you choose to use, you are now fully prepared for any task that requires screenshots on your Mac.

    24-inch iMac with 4.5K display
    Apple's new all-in-one has a 4.5K display, an M1 chipset, and comes in pretty colors

The post XDA Basics: How to take a Screenshot on macOS, using keyboard shortcuts, apps, and more! appeared first on xda-developers.


from xda-developers https://ift.tt/3g5f9x3
via IFTTT

Google Maps prepares to let you share your arrival time with stores

Google Maps is working on a new feature that will let you share your arrival time with stores to facilitate faster pickups. We spotted the upcoming feature in a teardown of Google Maps v10.72, which recently started rolling out via the Play Store.

An APK teardown can often predict features that may arrive in a future update of an application, but it is possible that any of the features we mention here may not make it in a future release. This is because these features are currently unimplemented in the live build and may be pulled at any time by the developers in a future build.

As you can see in the attached strings, the Assistive Pickup feature will give you an option to add your order to Google Maps and share your arrival time with the store for a faster pickup. The app will then share your estimated arrival time with the store automatically until you reach the store.

<string name="ASSISTIVE_PICKUP_ACTIVATION_SIGN_IN_PAGE_SUBTITLE">Sign in to add your order to Maps, for a faster pickup later</string>
<string name="ASSISTIVE_PICKUP_ACTIVATION_SIGN_IN_PAGE_TITLE">Save time at pickup</string>
<string name="ASSISTIVE_PICKUP_ARRIVAL_CHECK_IN_BUTTON_TEXT">Check in</string>
<string name="ASSISTIVE_PICKUP_ARRIVAL_CHECK_IN_SUBTITLE">Check in with the store so they can bring your order directly to you</string>
<string name="ASSISTIVE_PICKUP_ARRIVAL_CHECK_IN_TITLE">Pick up your order</string>
<string name="ASSISTIVE_PICKUP_ETA_PROMPT_OK">OK</string>
<string name="ASSISTIVE_PICKUP_ETA_SHARE_BUTTON">Share arrival time</string>
<string name="ASSISTIVE_PICKUP_ETA_SHARING_CONFIRMATION_PROMPT_TEXT">Sharing arrival time until you get to the store</string>
<string name="ASSISTIVE_PICKUP_ETA_SHARING_EXIT_PROMPT_EXIT_BUTTON">Exit</string>
<string name="ASSISTIVE_PICKUP_ETA_SHARING_EXIT_PROMPT_TEXT">"You'll also stop sharing your arrival time with the store"</string>
<string name="ASSISTIVE_PICKUP_ETA_SHARING_EXIT_PROMPT_TITLE">Exit navigation?</string>
<string name="ASSISTIVE_PICKUP_ETA_SHARING_IN_PROGRESS">Sharing estimated time of arrival</string>
<string name="ASSISTIVE_PICKUP_ETA_UNSHARE_BUTTON">Stop sharing arrival time</string>
<string name="ASSISTIVE_PICKUP_MORE_INFORMATION_DIALOG_BODY">Pickup orders are created from confirmations sent to your Gmail. You can turn this off in settings any time.</string>
<string name="ASSISTIVE_PICKUP_MORE_INFORMATION_DIALOG_BUTTON_TEXT">OK</string>
<string name="ASSISTIVE_PICKUP_MORE_INFORMATION_DIALOG_LEARN_MORE">Learn more about orders on Maps</string>
<string name="ASSISTIVE_PICKUP_MORE_INFORMATION_DIALOG_SETTINGS">Go to settings</string>
<string name="ASSISTIVE_PICKUP_MORE_INFORMATION_DIALOG_TITLE">Pickup orders on Maps</string>
<string name="ASSISTIVE_PICKUP_NAVIGATION_SHARING_NOTICE_PROMPT_ANOTHER_DEVICE_SUBTITLE">On another device</string>
<string name="ASSISTIVE_PICKUP_NAVIGATION_SHARING_NOTICE_PROMPT_CANCELED_SUBTITLE">Not available for pickup</string>
<string name="ASSISTIVE_PICKUP_NAVIGATION_SHARING_NOTICE_PROMPT_CANCELED_TITLE">Order canceled</string>
<string name="ASSISTIVE_PICKUP_NAVIGATION_SHARING_NOTICE_PROMPT_CHECKED_IN_TITLE">Already checked in</string>
<string name="ASSISTIVE_PICKUP_NAVIGATION_SHARING_NOTICE_PROMPT_PICKED_UP_TITLE">Order picked up</string>
<string name="ASSISTIVE_PICKUP_NAVIGATION_SHARING_NOTICE_PROMPT_UNKNOWN_SUBTITLE">Continue and check in at the store</string>
<string name="ASSISTIVE_PICKUP_NAVIGATION_SHARING_NOTICE_PROMPT_UNKNOWN_TITLE">"Can't share arrival time"</string>
<string name="ASSISTIVE_PICKUP_SHARE_DIALOG_BODY">Share your arrival with %s while you drive, and get your order even faster. Your real-time location is never shared.</string>
<string name="ASSISTIVE_PICKUP_SHARE_DIALOG_CANCEL_BUTTON_TEXT">Not now</string>
<string name="ASSISTIVE_PICKUP_SHARE_DIALOG_LEARN_MORE">Learn more about sharing arrival time</string>
<string name="ASSISTIVE_PICKUP_SHARE_DIALOG_SHARE_BUTTON_TEXT">Share arrival time</string>
<string name="ASSISTIVE_PICKUP_SHARE_DIALOG_TITLE">Ready to go?</string>

You will be able to create pickup orders from confirmations sent to your Gmail ID once the feature is live, and you’ll also get an option to turn the feature off in settings at any time. Furthermore, the feature will also include a “Check in” option to help you check in with the store “so they can bring your order directly to you.” The strings also note that the feature won’t share your real-time location with the store at any given time. We also found an image depicting the Assistive Pickup feature in the teardown and here’s what it looks like:

Image depicting the upcoming Assistive Pickup feature in Google Maps

As soon as Assistive Pickup rolls out on the stable channel, Google Maps will show you a card highlighting the new feature. It will include quick instructions to help you start using the new feature. Currently, the feature isn’t live in the latest Google Maps release. We’ll update this post as soon as it starts rolling out with a future update.

Google Maps has received a ton of new features in the last few weeks. These include an improved live view, new eco-friendly and safety features, and a tailored experience with richer info. You can learn more about these features by following the links above.

The post Google Maps prepares to let you share your arrival time with stores appeared first on xda-developers.


from xda-developers https://ift.tt/3vRbr0S
via IFTTT

Paramount+ introduces a new cheaper streaming plan

Paramount+, formerly known as CBS All Access, is replacing its current “Limited Commercials” plan with a new cheaper one. Earlier in February, ViacomCBS, the parent company of Paramount+, said that they would add a cheaper option in June. And the company is finally making good on its promise.

As spotted by Android Police, Paramount+’s FAQ page has been updated to mention that starting June 7, the old $6 plan will be phased out to make way for the new Essential plan. The new plan will cost $5 per month or $50 for a year. One downside of the new Essential Plan is that it no longer gives you access to your local CBS station, which is included in the current plan. You’ll continue to have access to NFL on CBS and UEFA Champions League via separate live feeds, though. If you would like to have access to live channels, you can subscribe to the Limited Commercial before June 7 — you’ll stay on it as long as you don’t cancel your subscription.

Here’s what you get in the new Essential Plan:

  • Stream with limited commercial interruptions
  • Watch 30,000+ episodes, movies & originals on demand
  • Stream NFL on CBS and Champions League live
  • Get 24/7 national news with CBSN
  • NO LOCAL, LIVE CBS CHANNEL

For an ad-free experience, access to local and live CBS channels, and the ability to download shows for offline watching, you can always go for the “Commercial Free” plan, which is priced at $10/month. Here’s what the top-tier plan has to offer:

  • Stream with no ads (except live TV & a few shows)
  • Watch 30,000+ episodes, movies & originals on demand
  • Stream NFL on CBS, UEFA Champions League, and additional top soccer leagues, plus even MORE sports like PGA golf and NCAA basketball
  • Get 24/7 local and national news with CBSN and CBS live
  • Download your shows to watch offline, anytime
  • INCLUDES YOUR LOCAL, LIVE CBS CHANNEL

Launched in March as a rebranded version of CBS All Access, Paramount+ is home to Star Trek: Discovery, The Spongebob Movie: Sponge on the Run, Nickelodeon, Comedy Central, and MTV. It’s a relatively niche streaming service, having around 8 million subscribers. The service is currently available in the US, Canada, Latin America, Australia (as 10 All Access), Poland (as Paramount Play), and select Nordic and Middle East countries.


The post Paramount+ introduces a new cheaper streaming plan appeared first on xda-developers.


from xda-developers https://ift.tt/3ieTQM4
via IFTTT